Put a driver's side 2013 sun visor in my 2011 Leaf...

My Nissan Leaf Forum

Help Support My Nissan Leaf Forum:

This site may earn a commission from merchant affiliate links, including eBay, Amazon, and others.
Went ahead and ordered one from the Nissan discount link.
With shipping and handling? it came to $94.75

Not that big a discount when I was done, but I didn't have to go to the dealer and explain to him what I was up to this time :roll:

I hope someone else successfully proves the "new visor / old mount force-it-in-there" plan before I get mine.

Thanks
 
I haven't been ignoring ya'll, just busy! I posted a major update to the mod at the beginning of the thread: the visor stem wasn't staying in place after repeated rotations (as someone suspected), so I had do some more work on the mount. Don't laugh: I tried some other (more elegant) solutions, but when nothing held I just screwed a lock-nut down on the thing; if it comes loose again, I'll just take more plastic off and screw it down further!
 
So long as it works for you, that's all that matters. :D I gotta applaud you for being first and going full-bore into getting 'er done.

Another possible way to secure it would be to cut a channel in what's left over of your stalk and use a circlip of appropriate size.

Did you see the question about whether the part of the rod that fits in the clasp towards the center of the car lines up properly?
 
mwalsh said:
So long as it works for you, that's all that matters. :D I gotta applaud you for being first and going full-bore into getting 'er done.

Another possible way to secure it would be to cut a channel in what's left over of your stalk and use a circlip of appropriate size.

Did you see the question about whether the part of the rod that fits in the clasp towards the center of the car lines up properly?

I forgot about that question: yes, the rod lines up just fine (that would have been an ender).
That "cut a channel" thing would work in theory, but I'm not sure if the stalk would last. I wish that stupid $2 end clip I bought would have worked. :x
 
mwalsh said:
Ugh! Mine isn't going to ship until the 17th. Guess we'll be waiting a couple of weeks for this mod. :(

I got the same message.
17th.
We are probably going to upset their inventory management.
Their demand just shot up like 500% because of the interest in this mod :)
 
STOP!

Plan "A" does not work!
The shafts are very different in shape.
I did a really artistic job of harvesting the old mount and new visor, and you can insert the new shaft in the old mount, but it wont come up far enough to engage the 4 locking pins.

I'm working on plan "B" (and "C") at the moment.
 
KillaWhat said:
STOP!

Plan "A" does not work!
The shafts are very different in shape.
I did a really artistic job of harvesting the old mount and new visor, and you can insert the new shaft in the old mount, but it wont come up far enough to engage the 4 locking pins.

I'm working on plan "B" (and "C") at the moment.

That's why I sanded down the "old" mount--to expose more of the "new" shaft.
Was that not clear in my updated pic? :oops:
 
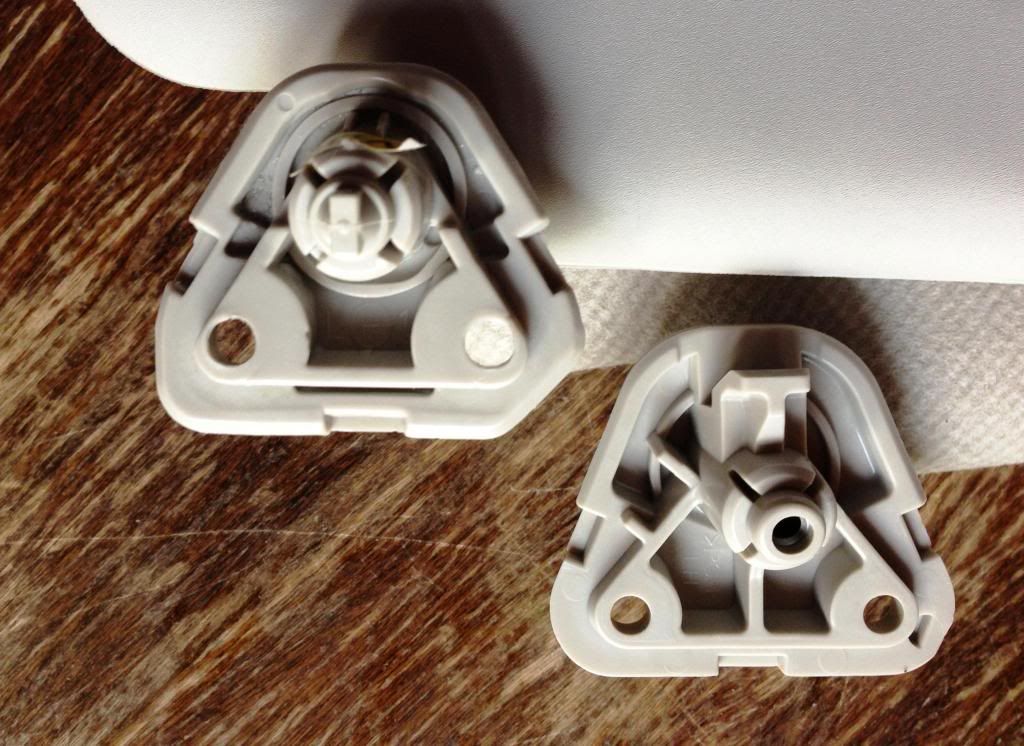
These are the 2 different visors before modifications.
The '13 has the hole in the shaft.
Still looks good.

IMG_4788.jpg


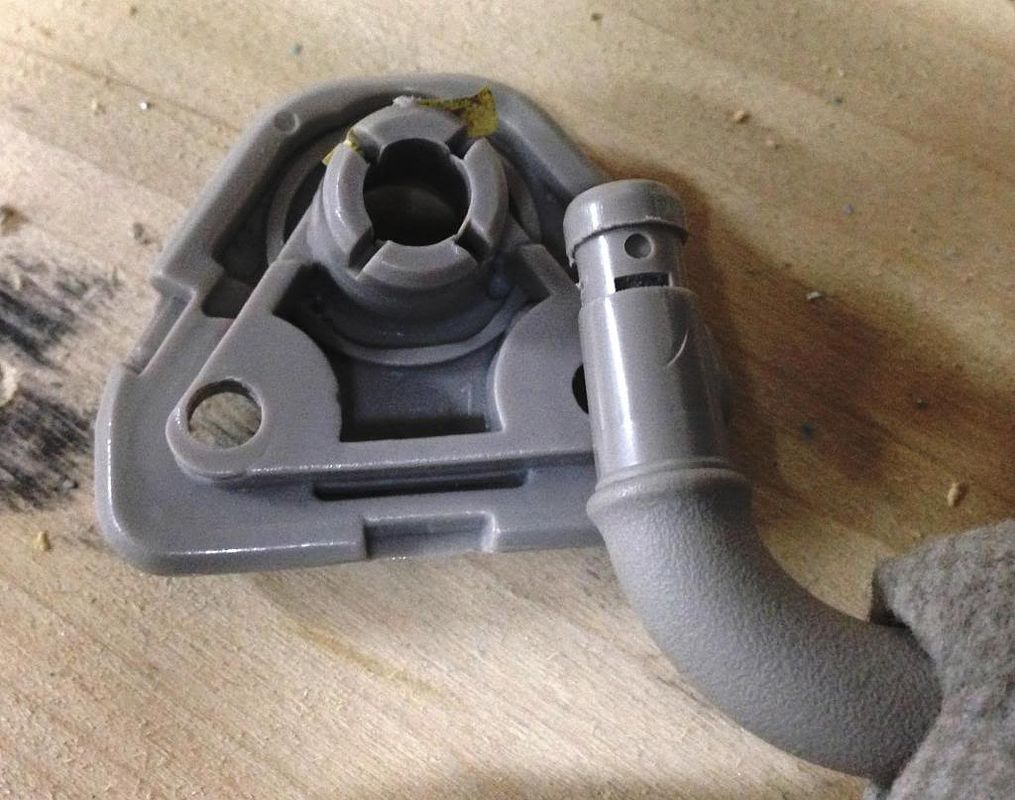
This is the harvested "old '12" mount, and the New '13 Visor shaft.
Still looks good.

IMG_4794-1.jpg


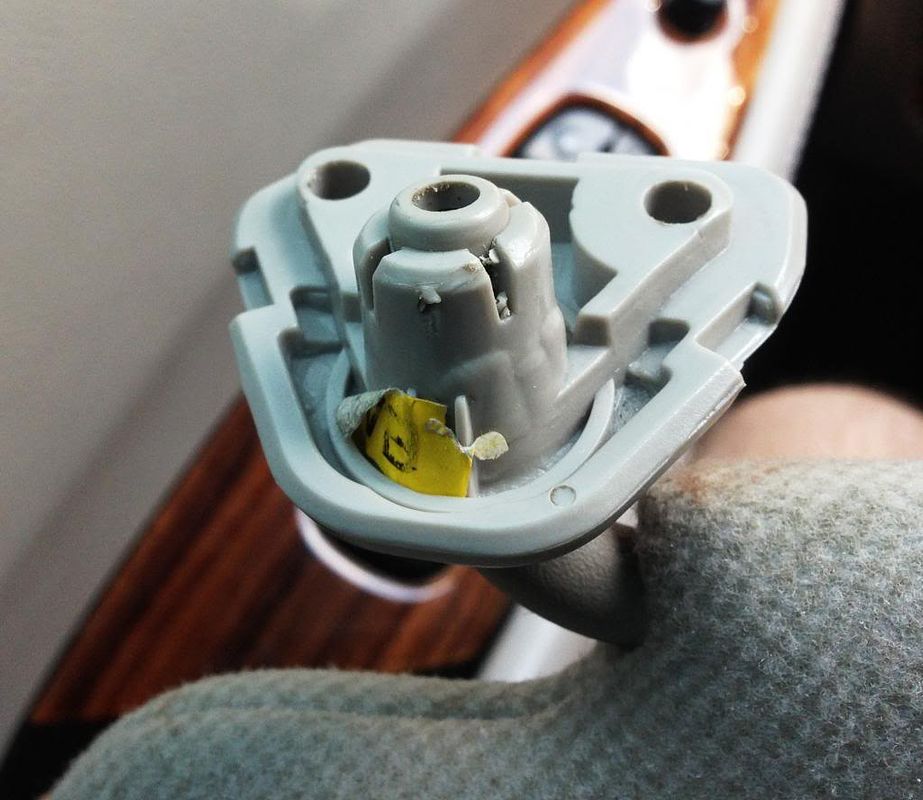
This is the assembled unit.

IMG_4795.jpg


It fits in, comes up through the mount, and stops about 2mm short.
Forcing it is of no help, and I'll tell you why.


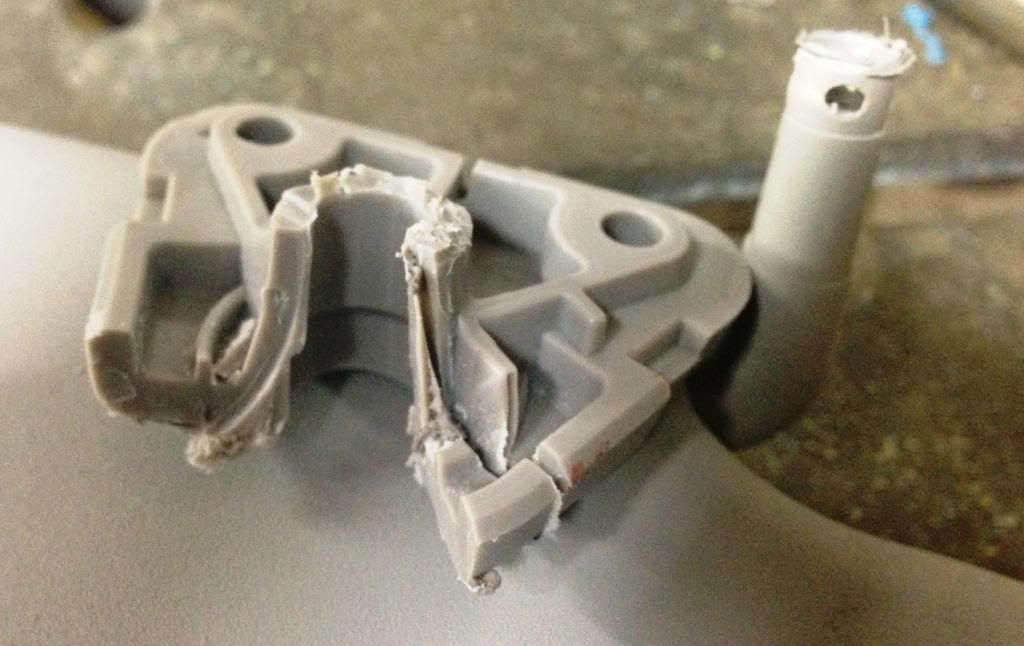
The New '13 mount has a "shoulder" in there, that corresponds to a ridge on the '13 visor shaft.
Whereas the old '12 mount and shaft are tapered, no shoulder.
Can kind of see here.


IMG_4796.jpg


(new mount and old shaft)

So, I am left with the following options as I see it:

1) Throw it in the garbage, buy a replacement '12 Visor, and never tell my wife I spent $200 to try to get a pull out piece for the drivers visor.

2) Trade '12 in for a '13 to get pull out visor piece.

3) Try to modify the new shaft by reducing the shoulder so that the shaft can move up 2mm. My concern is that as the '12 system relies on taper,
I'm not 100% sure that the 4 locking pins will close around the new '13 mount. Iffy.... maybe 50/50

4) Try to modify the Old '12 mount by trimming 2mm off the 4 locking tabs, allowing the amount of protrusion I have to sit flush with the tops of the tabs
and engage the "bumpy outy thing". Again, this only works if the tabs on the old mount don't rely on the taper to engage. Again, not sold.

5) Trim off the bumpy outy thing on the new '13 shaft just below the 4 mounting tabs. Then fill the hole in the shaft with some serious resin,
when hard, drill a pilot hole in the shaft, and thread a screw through a flat washer and split washer (to add tension) and stick it together like that.

I will wait a day or so to see if anybody tries plans 3 or 4 with success, and then I think it's #5 for me.

OH. there is a #6, which does not apply to me.
You can try to mount the entire new visor assembly into the old mounting location in the car.
You will have to Dremel the holes in the new mount to make them line up with the old holes in the car, but the screw cover part (NOT included with my new visor) will cover a wide range of Dremel sins.
 
Stanton said:
KillaWhat said:
STOP!

Plan "A" does not work!
The shafts are very different in shape.
I did a really artistic job of harvesting the old mount and new visor, and you can insert the new shaft in the old mount, but it wont come up far enough to engage the 4 locking pins.

I'm working on plan "B" (and "C") at the moment.

That's why I sanded down the "old" mount--to expose more of the "new" shaft.
Was that not clear in my updated pic? :oops:


Well...... It's becoming clearer :roll:
I think I'm going to wind up doing the "internal" version of your "retaining nut"
 
What about just taking the two mill by removing one mill from each of the parts? Cut the ridge on the stalk a little higher and file down the top of the mount?

Is there a possibility that the clasps still won't "engage" if it otherwise fit? If that's the case, my idea of a channel cut into the stalk for a circlip might be valid. In fact, it may not even be necessary for a channel - just get a circlip that sits tightly around the stalk, sitting up against the ridge, and with enough girth to sit on top of the mount clasps. Of course, you'd then have to take the thickness of the circlip into account in your filing.
 
Well, since my visor arrived, I couldn't resist having a go. And...I chickened out some, based on what you guys had been through, and decided to modify the new mount instead of swapping the two around.

I needed to take a majority of that hook protrusion off (but notice I left some...details later); remove the two uprights on the left side of the mount (or you could trim back your headliner some, if the fit bothers you...they catch on it); and oval out both the screw holes and their countersinks.

Tools needed were a Phillips head screwdriver (obviously) and a rotary tool (Dremel 300 w/ variable speed) with a cutting wheel; a sanding drum; and a routing bit for ovaling the screw holes (sanding drum for the countersink holes and the routing bit for the actual screw holes).

Note how I left a nub from the hook protrusion. I was finding that if you left a bit of that, it would still "hook" into the original hole in the car's chassis, so long as your offered the front of the mount into the hole first. I figured this would be beneficial in giving the assembly a little more support than just with the two screws. So trim carefully if you want to do the same thing.

I'm still missing a part in that the old screw cover doesn't work with the new mount. But I guess I can wait for that until I'm ready to order more parts from the same outfit. Now I'm thinking of doing the other side too, since my visors no longer match. But not right away, since money is a bit tight.
 

Attachments

  • Img_7556.jpg
    Img_7556.jpg
    41.6 KB · Views: 89
  • Img_7558.jpg
    Img_7558.jpg
    36.7 KB · Views: 89
That looks really nice. I wish the extension were wider, since it doesn't cover much window for me to go to the trouble & expense, but I applaud you gentlemen for your efforts. Even sitting tall in the seat (I'm 5'4"), I'd probably still see the sun peeking beneath or to the left of that extension during my morning/evening commutes. It looks like its primarily designed for use above the rear-view mirror. I'll have to get by with my primitive cardboard extension :( (at least it's visor-width). Nice job figuring this out and good luck tweaking the fit.

Kathy
 
KillaWhat said:
4) Try to modify the Old '12 mount by trimming 2mm off the 4 locking tabs, allowing the amount of protrusion I have to sit flush with the tops of the tabs and engage the "bumpy outy thing". Again, this only works if the tabs on the old mount don't rely on the taper to engage. Again, not sold.

This is what I would do in hindsight, but mine is still holding (with the lock-nut in place) and it's doing the job on my ride to/from work.
I abandoned the "modify 2013 mount" version when I noticed the screws didn't line up (which was NOT obvious when I did a quick check at the dealer parts store). I have no plans to swap out the passenger side visor (even though the 2013 visor's look a lot better)!
 
Back
Top