


Gibson503
New member
Replaced the climate control module on my 5/2013 SL today, and I hadn’t seen instructions here or elsewhere before I did it...so if anyone’s interested:
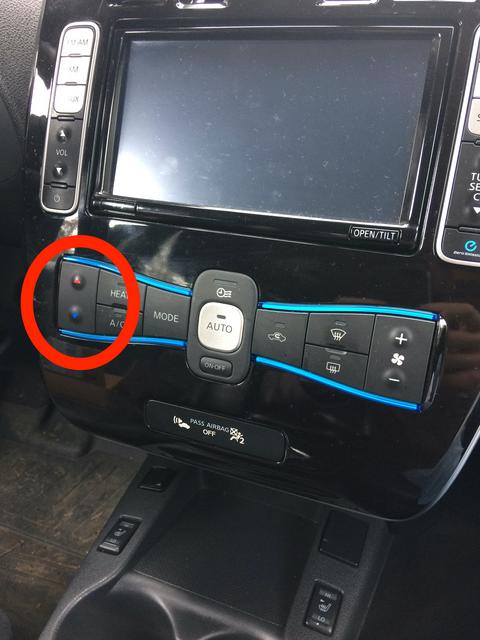
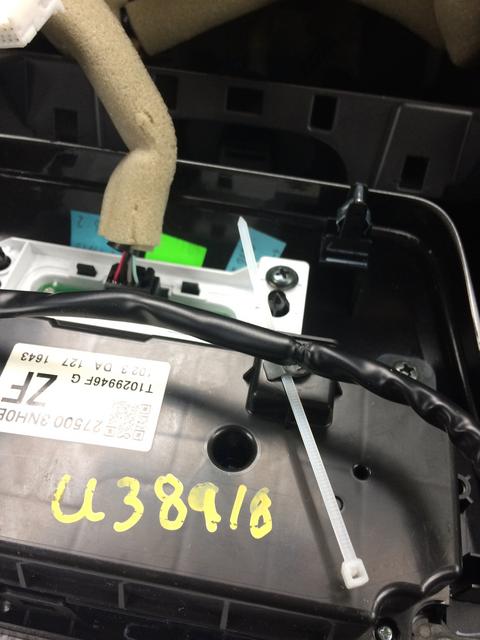
The blue down arrow temperature decrease button was feeling “gummy”...starting to stick and was occasionally unresponsive particularly in cold weather. After some research, identified the Control Unit on parts.nissanusa as 27130. My specific part was 27500-3NH0C, which my dealer was selling for a little under $500. Watched some YouTube videos about how to remove the radio/climate bezel, and confirmed my unit was 27500-3NH0A. A little eBay hunting and I found a salvaged 27500-3NH0B from the same trim and model month/year as my Leaf for $50. The only difference between all these parts was the last letter....new part was C, salvaged part was B, mine was A. Parts.nissanusa says the A and B versions are supersessions to the C...I have no idea what that means in this context, but I hoped it meant I could use an A, B, or C and all would be well. So I gave it a shot...
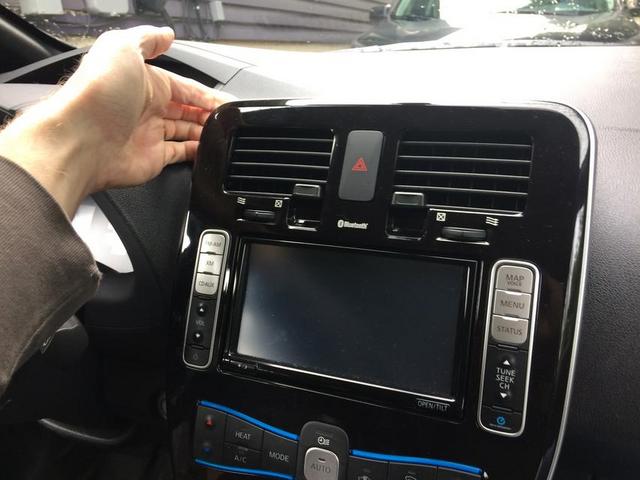
Remove the bezel putting both hands at the top and pulling gently and it’ll pop out a little. Same pull and pop with both hands on the bottom. (I used both hands to pull, but needed to hold my phone with a hand for the picture)
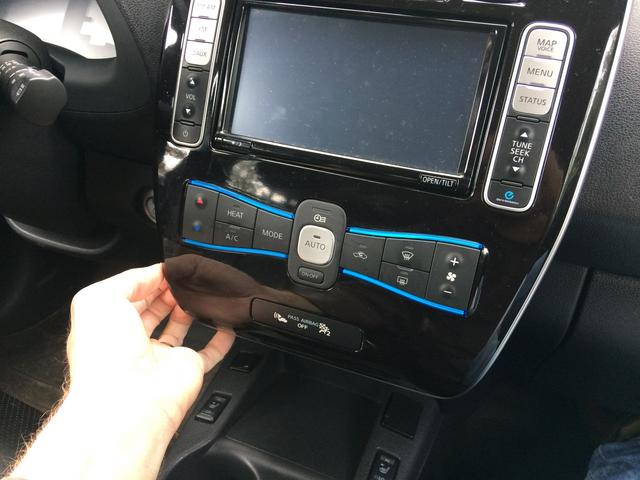
Little hook at the top requires you to lift up and out to remove.

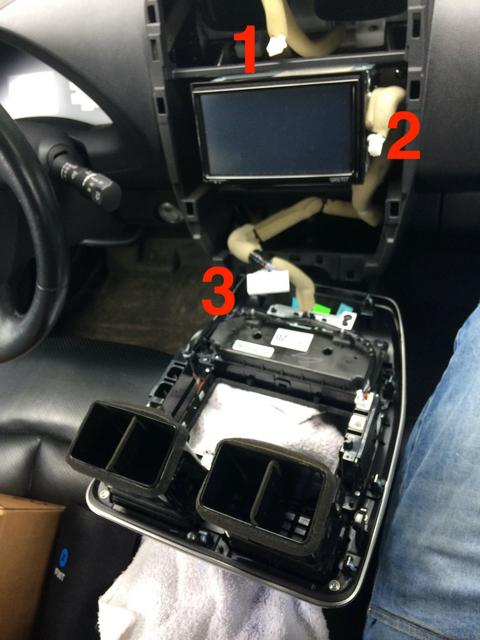
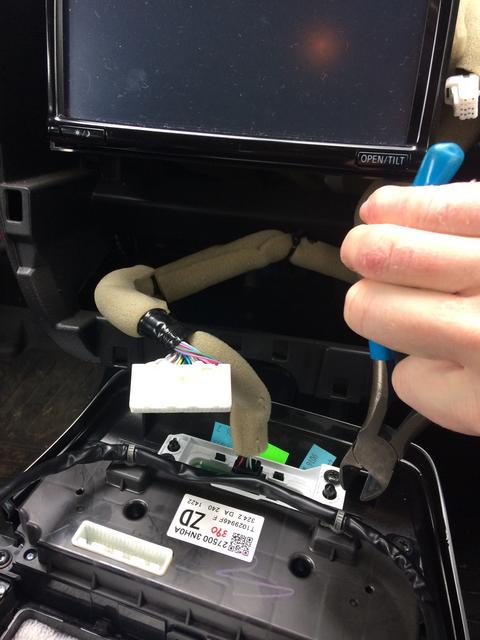
Remove the hazard light connector at the top (probably the hardest part of the whole deal for fat fingers)

Remove the passenger side radio control connector
Remove the climate module connector
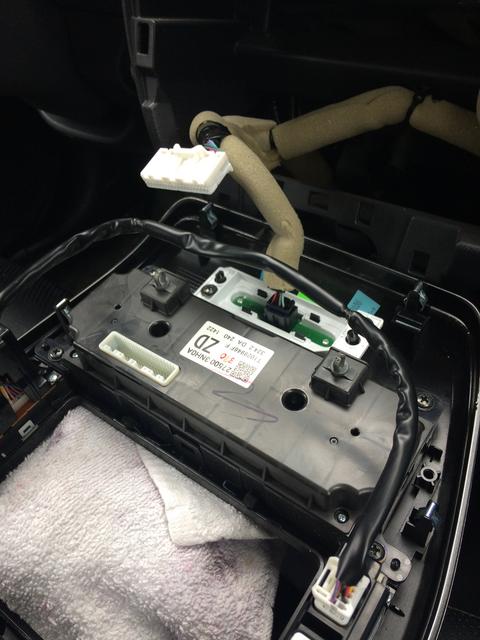
Lay the bezel down on the center console (I put a rag down to protect it). I was able to keep the lowest connector (airbag light) connected.
Cut the 2 grey zipties on the back of the climate module keeping the harness connecting the drivers side radio buttons to the passenger side buttons
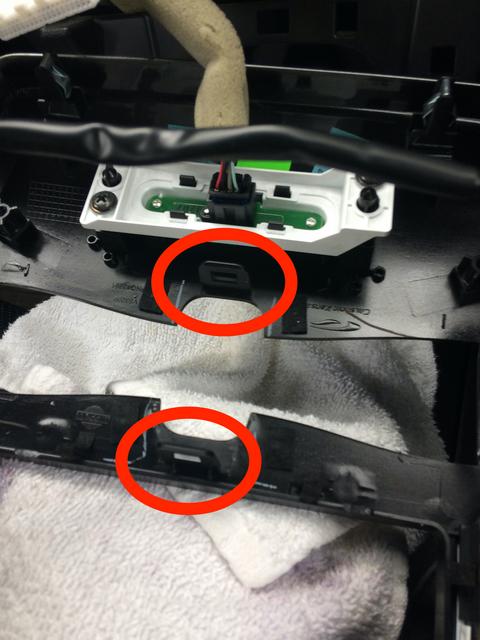
Remove the 4 climate module screws and it easily pops out from the bezel (there are some tension clips on the top and bottom).

Insert the new unit and attach the 4 screws.
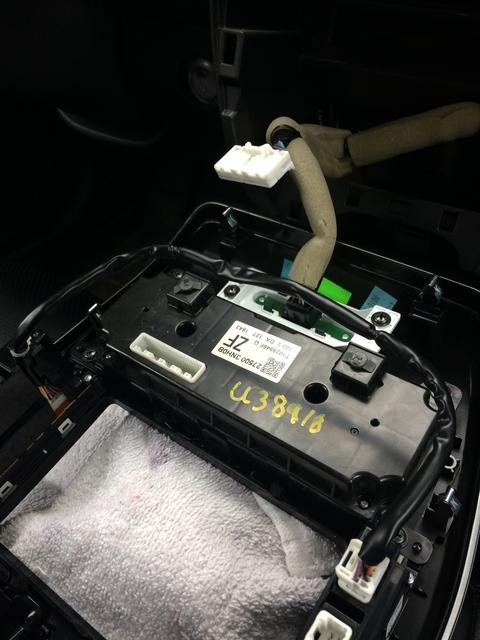
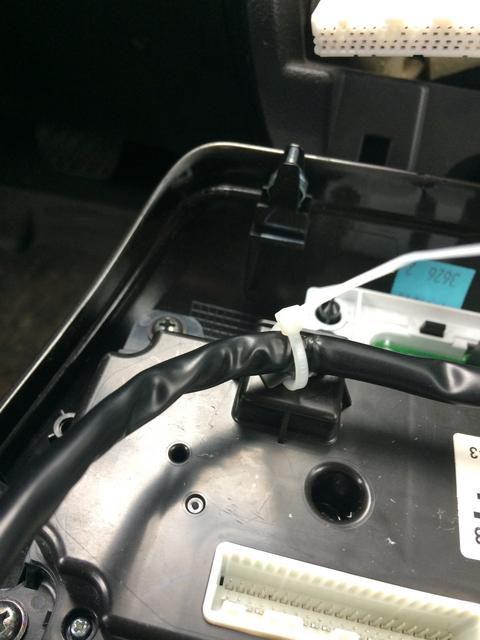
The grey zipties on the replacement module were cut when I received it, so I just ran some new white zipties around base of the old zipties just to keep the harness piece in place...worked just fine.
Reconnected the climate, radio, and hazard connectors and popped the bezel back into place.
Seems to work great. Functional cool-temperature button for $50 and about 20 minutes!
The blue down arrow temperature decrease button was feeling “gummy”...starting to stick and was occasionally unresponsive particularly in cold weather. After some research, identified the Control Unit on parts.nissanusa as 27130. My specific part was 27500-3NH0C, which my dealer was selling for a little under $500. Watched some YouTube videos about how to remove the radio/climate bezel, and confirmed my unit was 27500-3NH0A. A little eBay hunting and I found a salvaged 27500-3NH0B from the same trim and model month/year as my Leaf for $50. The only difference between all these parts was the last letter....new part was C, salvaged part was B, mine was A. Parts.nissanusa says the A and B versions are supersessions to the C...I have no idea what that means in this context, but I hoped it meant I could use an A, B, or C and all would be well. So I gave it a shot...
Remove the bezel putting both hands at the top and pulling gently and it’ll pop out a little. Same pull and pop with both hands on the bottom. (I used both hands to pull, but needed to hold my phone with a hand for the picture)
Little hook at the top requires you to lift up and out to remove.
Remove the hazard light connector at the top (probably the hardest part of the whole deal for fat fingers)
Remove the passenger side radio control connector
Remove the climate module connector
Lay the bezel down on the center console (I put a rag down to protect it). I was able to keep the lowest connector (airbag light) connected.
Cut the 2 grey zipties on the back of the climate module keeping the harness connecting the drivers side radio buttons to the passenger side buttons
Remove the 4 climate module screws and it easily pops out from the bezel (there are some tension clips on the top and bottom).
Insert the new unit and attach the 4 screws.
The grey zipties on the replacement module were cut when I received it, so I just ran some new white zipties around base of the old zipties just to keep the harness piece in place...worked just fine.
Reconnected the climate, radio, and hazard connectors and popped the bezel back into place.
Seems to work great. Functional cool-temperature button for $50 and about 20 minutes!