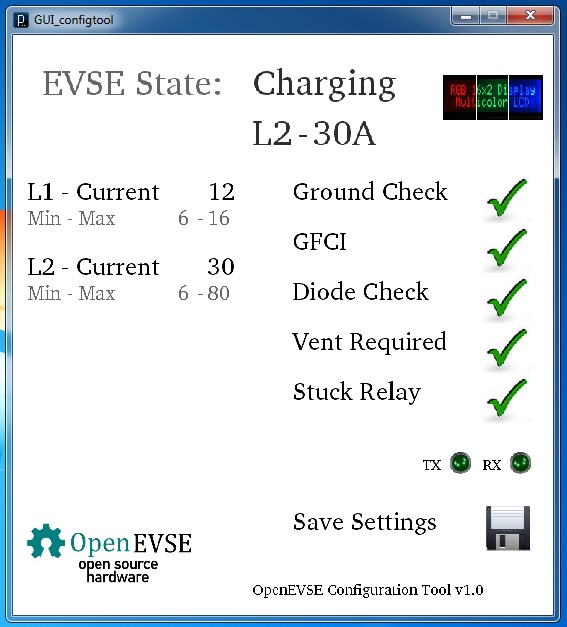
OpenEVSE - Open Source Charging Station

My Nissan Leaf Forum

Help Support My Nissan Leaf Forum:

This site may earn a commission from merchant affiliate links, including eBay, Amazon, and others.
Thanks! PM sent. I think the one I am using is the larger box. It was in the $20 range. Based on my inexperience, I wanted the extra room to play with. Also may add WIFI and other toys as time goes on.

I am already thinking of putting a second unit outside for guests and potential second EV for the kids. I may just skip the LCD and the button for that one and just go with a case mount RGB Led.
 
Yea, the 8X8 inch box is a few dollars more. I usually use the 6.5X6.5X4 inch box at 11.78 plus tax. One thing I have found the hard way, Check the lid edges carefully. Often they are broke. I did a unit for a member with a small flaw that did not effect the seal but it was not perfect.
 
AlanSqB said:
Thanks! PM sent. I think the one I am using is the larger box. It was in the $20 range. Based on my inexperience, I wanted the extra room to play with. Also may add WIFI and other toys as time goes on.

I am already thinking of putting a second unit outside for guests and potential second EV for the kids. I may just skip the LCD and the button for that one and just go with a case mount RGB Led.

The DIY display board has a space for a positive common LED. Chris sells a tiny I2C led that is stand alone. The Barbouri board has outputs for a common minus led like Chris used in his early boards. Use a diffused led since it makes better yellow. The clear ones allow you to see the individual leds.

You can order naked display boards from OHS Park for 21.40 for 3. For a led only Chris's board is a better option. Sometimes I use a monochrome lcd and a RGB LED like on the unit I have for sale. In that case I use the I2C driver for the RGB LED and just ground the LCD backlight.
 
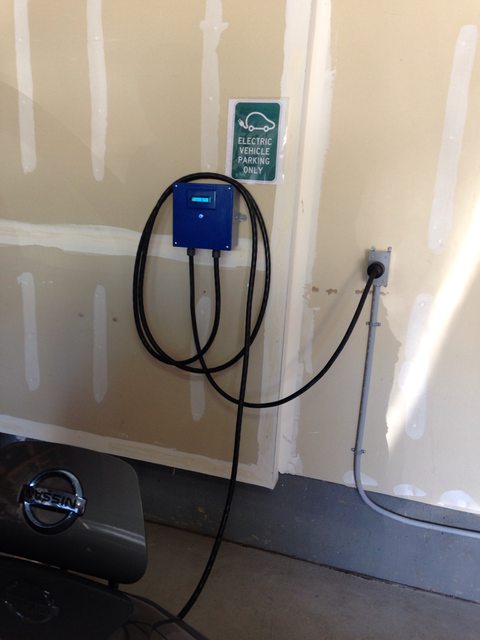
Finally got time to wire up a proper outlet and hang everything up. Very happy with this project.

LRVgCd6l.jpg
 
Bezel frames arrived yesterday. I really like how the grey ones have the little bumps on the side to snap in. Even the biggest one isn't big enough to cover my mistake, but I'm going to work them in on the fix.

Thanks Glenn.

The unit is still working great. I am in the process of teaching myself how to use Arduino IDE to compile and load the code so I can update the firmware. Would like to add the amperage monitoring and thinking of hooking up my RPi with an interactive web page.
 
AlanSqB said:
Bezel frames arrived yesterday. I really like how the grey ones have the little bumps on the side to snap in. Even the biggest one isn't big enough to cover my mistake, but I'm going to work them in on the fix.

Thanks Glenn.

The unit is still working great. I am in the process of teaching myself how to use Arduino IDE to compile and load the code so I can update the firmware. Would like to add the amperage monitoring and thinking of hooking up my RPi with an interactive web page.

I can make the white PLC one wider. It seems to show less flaws than ABS. How wide do you need?

The bumps are from the original. It took a while to figure out how to eliminate them. It looks like it snaps into a precise hole in a metal panel.

The current works well with the latest DIY board. I used a pot on top in the holes and a fixed resistor under the board in the same spot. That was so I can tweak it exact. I have used both the default 30A and the optional 50A. I had a Chinese coil left over from a wrong hookup when they changed the connections. It worked fine but it was more sensitive and required a smaller burden resistor.

I think that if there is room I like the stand alone meter better. The display has smoothing and it does not jump around as much. It also has a voltage display. On the other hand the built in adds no more real estate.

Lincomatic offered to let me play with the RAPI but walking up to the unit is good enough for me.
 
In a departure from earlier versions you edit the .h file, not the .ino. The files need to be in a folder in the library area. I use version 1.01. 1.05 does not work for me. 0.0023 stopped working for me.

If you have a real time clock you can nor have RAPI. You can have only one, CLI, RAPI, or RTC.
 
I was going to offer to burn a chip for you with the desired options but I went back and noticed you did not use a socket so you are out of luck.

I had a lot of fun a while back getting Arduino and OpenEVSE to work. I am sure if you are a programmer type it is a piece of cake. Have fun.
 
Yes I defiantly see the benefit of the socket now. The code isn't an issue for me, I am/was? a programmer. I just haven't ever used an Arduino so the learning I'm doing is all around the compiler and the loader. I'm also worried about loading a bad hex and having it out of service while I figure things out so I will probably buy another unit for testing before I do too much more playing around.

Can I just disable the RTC and go with the RAPI or is it tied into having the clock chip on board?
 
Since the RTC is not seen until is is enabled I think you are fine. The real reason it is either RTC or CLI, RAPI is a memory issue. Even though the eeprom has room the ram is used up. CLI and RAPI use the same port so it is one or the other. Before Lincomatic automatically disabled the serial port when RTC was selected many strange things happened.
 
Arduino may make a hex file for AVRDude but you never see it. In Arduino you can check the compile with control R. A compile and program is control U.

The Atmel chips program while in a reset state so you can recover from anything.
 
Lots of good stuff going on with OpenEVSE....

Firmware 3.x was brought out of Alpha and Beta and now the current stable version is 3.2.2. The biggest new feature is the Remote API, which allows for communication with external Apps, webservers, devices, smart displays, etc. without requiring special code on the OpenEVSE.

Here is a preview...
RAPI.jpg
 
Also....

OpenEVSE Plus v3 http://store.openevse.com/products/copy-of-openevse-plus-v3 is out. It is a board for Level 2 charging stations. It adds a opto-isolated line voltage AC relay trigger to drive large contactors. It also adds current measurement.

To go along with the new board is a 50A Level 2 Charging station kit.
http://store.openevse.com/collections/openevse/products/openevse-50a-charge-station-combo-with-enclosure" onclick="window.open(this.href);return false;

Build Guide
http://openevse.dozuki.com/Guide/OpenEVSE+50A+Charging+Station/8" onclick="window.open(this.href);return false;

uhIhbvIpU14VLu5G.medium
 
This project is awesome, thanks Chris et al. for all your work so far!

I picked up my first Leaf last week and I just wired up a NEMA 14-50 outlet in my garage yesterday in preparation to purchase your new 50A Level 2 Charging station kit but have a couple questions before ordering.

1) Which J1772 cable should I get? I'm guessing the one rated at 40A, but it's kind of confusing. The one rated at 32A has 10AWG conductors and the one rated at 40A has 12AWG. Why does the lower amperage cable have thicker wire and is heavier duty?

2) I'd like to make it portable, so I'm thinking of getting the box without flanges, but I'm wondering if there's an easy way to mount/hang it in my garage while I'm not bringing it with me? I'm guessing 90% of the time I'll have it in my garage, but I'd like to be able to take it with me if needed. Should I get the one with flanges and use some sort of quick release fasteners?

3) Would using this plug from Amazon be acceptable or should I use my leftover 6/3 wire from the outlet installation and pickup a 14-50 plug?
 
The Quick Charge Power 40A cable that Chris sells would match this fine and allow 40A Tesla charging. For budget use you can currently buy an unused 30A Yazaki 16 ft cable on Ebay for $100 plus $20 shipping.

I have purchased 5 of them. They are shipped from a company in Irvine in Yazaki boxes dated in 2011. It looks like someone was expecting an EV rush that unfortunately never happened.
 
isorfir said:
1) Which J1772 cable should I get? I'm guessing the one rated at 40A, but it's kind of confusing. The one rated at 32A has 10AWG conductors and the one rated at 40A has 12AWG. Why does the lower amperage cable have thicker wire and is heavier duty?

I think the 40A one has two 12AWG conductors for each of the power lines.
 
JeremyW said:
isorfir said:
1) Which J1772 cable should I get? I'm guessing the one rated at 40A, but it's kind of confusing. The one rated at 32A has 10AWG conductors and the one rated at 40A has 12AWG. Why does the lower amperage cable have thicker wire and is heavier duty?

I think the 40A one has two 12AWG conductors for each of the power lines.

you are correct, Sir. It's the same style cabling that Tesla uses on their UMC, there are (2) #12 AWG Red conductors, and (2) #12 AWG Black conductors, as well as a #12 Green ground, and 2 smaller #18 control wires (pilot, proximity), and a #20 wire as well (used to power the RF release, used on the Model S UMC head)

The cabling is very small in diameter, and very flexible.. that's the main advantage.

Here is the source/specs of the cable:
http://shop.quickchargepower.com/Cable-40-Amp-C8-40A.htm;jsessionid=429DAF7310E35938BE262A8C88415C50.m1plqscsfapp05" onclick="window.open(this.href);return false;
 
I'd like to build a evse that is adjustable with a rotary selector switch, or a ten turn pot with a display showing the amps it is set for. I want one I can use on the road that is easily settable.
 
Back
Top