


OrientExpress
Well-known member
I recently upgraded the high-beam headlights on my 2014 LEAF SV from H9 Halogens to H9 LED lamps. Having done many of the HID upgrades over the years, with the external ballast, and the beam focus problems that HID retrofit kits have, I have to say that these LED retrofit kits are superior in every way.
The upgrade was very easy and took less than an hour. The difference between the stock high-beams and the LED high beams is quite remarkable, and only set me back abut $55 for the pair of lamps.
I purchased these high beam lamps on eBay, and am quite satisfied with them.
The upgrade process is simply remove the stock halogen lights, and replace them with the new LED lights and their adapter cable. Everything fits inside the headlight housing, and unlike HID retrofits, no cutting or drilling (other some slight filing of a support in the left headlight enclosure described in this narrative) is required. Remember these upgrade kits are generic kits, and may have some extra pieces that you won't need. The kit I used has some extra mounting adapters and a rubber boot to cover the headlight enclosure access port. These are not necessary for using that LED upgrade kit with the LEAF.
UPDATE:
I have updated this post with more info on the various details of this DIY.
First off before attempting to do this yourself, you should have some basic automotive knowledge to be successful with this DIY mod, primarily knowing how to remove and replace an automobile headlight bulb, use of common hand tools, and knowing what the headlight configuration of your LEAF is. Without these three pieces of basic information, then it is probably best to avoid attempting this DIY.
The headlight configurations of the 2011-2015 LEAF are:
2011-2015 LEAF SL: LED low beams, H9 halogen high beams
2011-2012 LEAF SV: LED low beams, H9 halogen high beams
2013-2015 LEAF SV: H13 Halogen low/high beams
2013-2015 LEAF SV w/LED Headlights and Quick Charge Port Package: LED low beams, H9 halogen high beams
2013-2015 LEAF S: H13 Halogen low/high beams
The terms H9 and H13 refer to the type of mounting the bulb uses, and is the type of bulb you will look for when ordering your LED upgrade kit.
Here is what the two types of headlights are used for the 2011 - 2015 LEAF look like:
2011-2015 LEAF SL and SV with LED low beams and H9 Halogen high beam headlights:

2013-2015 LEAF SV and S with H13 Halogen low & high beam headlights

Here is what the two types of headlights look like side by side H13 on the left and H9 on the right.

All headlight bulbs have alignment tabs which must be properly aligned with the headlight housing to properly mount the bulb. For H9 & H13 bulbs there are 3 tabs with the center tab being longer that the two other tabs. The bulb is inserted and then twisted to lock it in place. These tabs must be properly aligned, and must be fully twisted into place. When installing the bulb don't force the bulb. There is enough room that you can look at the bulb from the front of the headlight to properly insert it and twist it into place.
The following narrative describes the installation of a H9 bulb into a LED low beam equipped headlight. Click here for a narrative on installing a H13 bulb into a Halogen low/high beam equipped headlight.
CREE/LTI LED bulb along with my LED city light in the high beam reflector.

Rear view of LED assembly viewed from headlight assembly access port.

Complete LED assembly with heat sink and H9 adapter cable

Rear view of LED assembly with heat sink and H9 adapter cable

Front view of LED assembly with heat sink. Notice the tabs on the base of the lamp. these tabs must be properly oriented with the headlight enclosure to properly install it and the yellow gasket must be fully seated around the base of the lamp.


This is what the lights look like head-on and compared to sunlight.

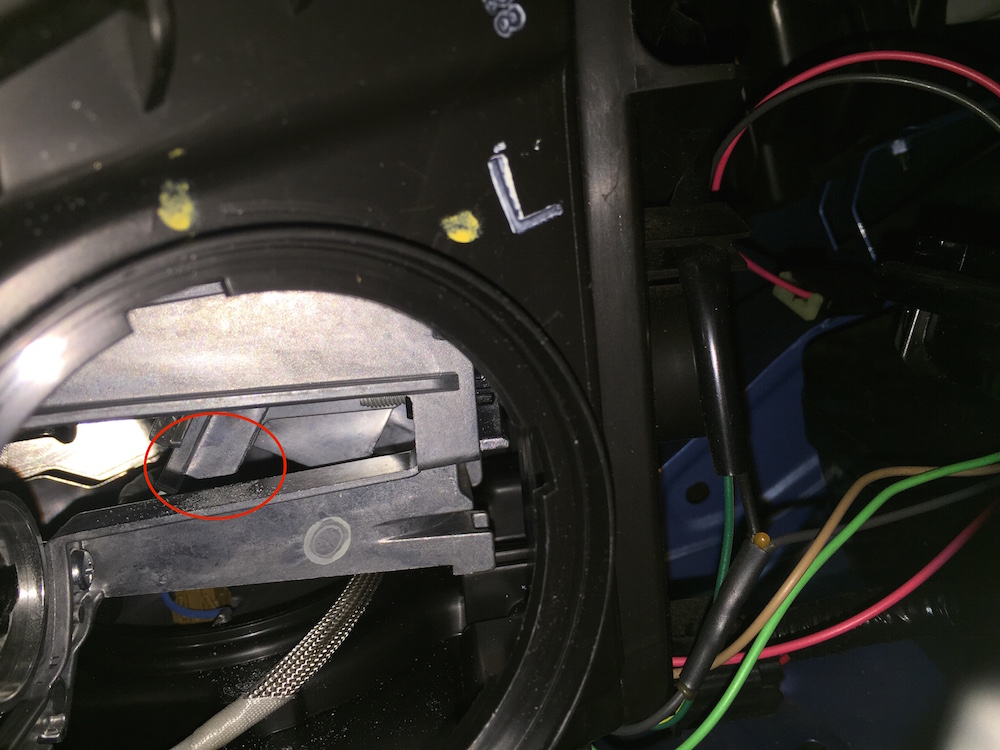
After I had installed the HID upgrade kit on my LED low beam equipped SV I found a small issue with the right side (left side if looking at the car from the front) high beam enclosure and an interference issue between the enclosure and the bulb that causes the LED bulb assembly to point lower than it should. This causes the beam spread to have a hotspot in the mid-right side.
At issue is an structure in the right side headlight enclosure which interferes with the bulb
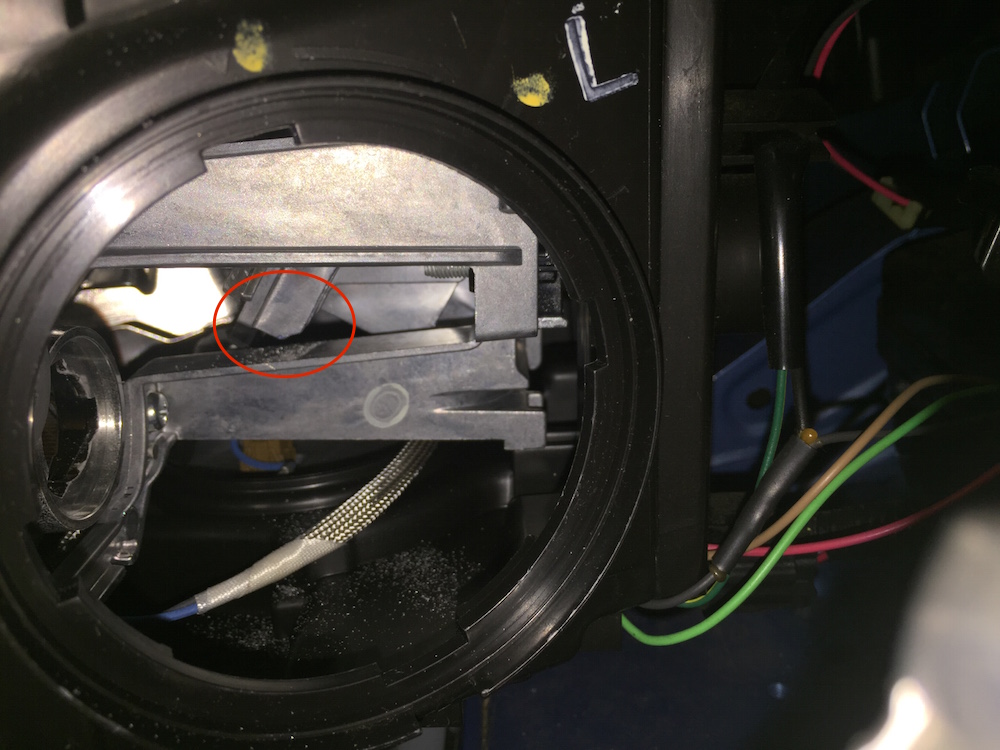
The fix is to take a small flat file and remove about 1/64th of the bottom of this piece of aluminum.
The second issue is that the H9 mounting collar tolerance on the LED bulb is a bit loose which can cause the bulb to point off axis if there is interference if the bulb assembly rubs against the enclosure.
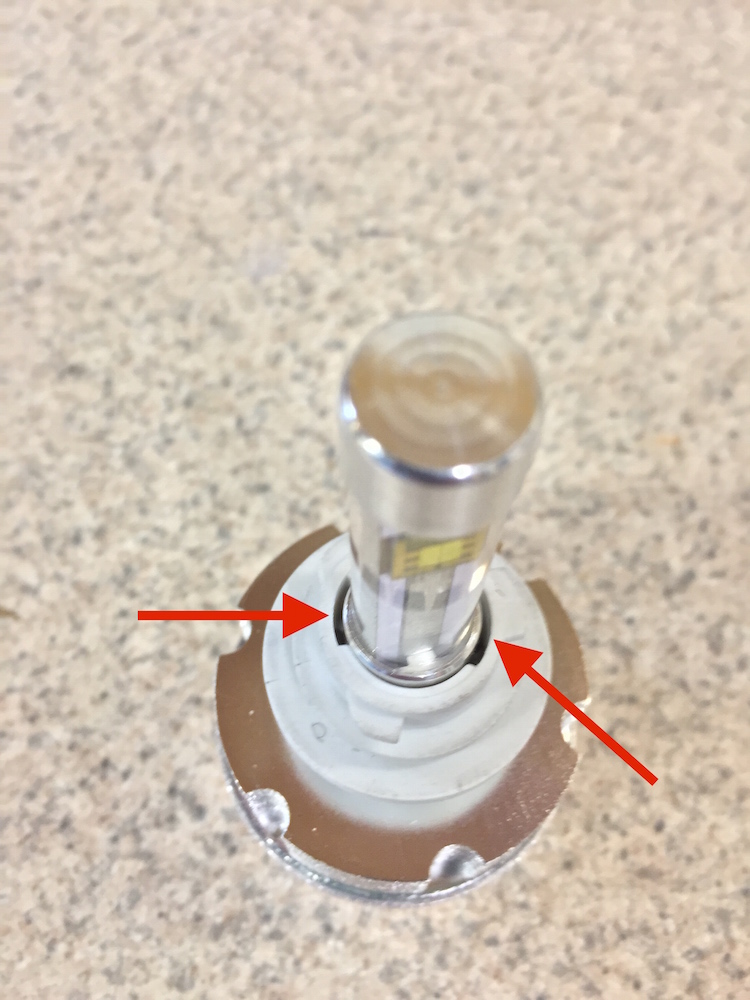
The solution that I MacGyvered was to take a plastic Zip-tie and insert it in the mount gaps to tighten the mount up against the bulb globe.

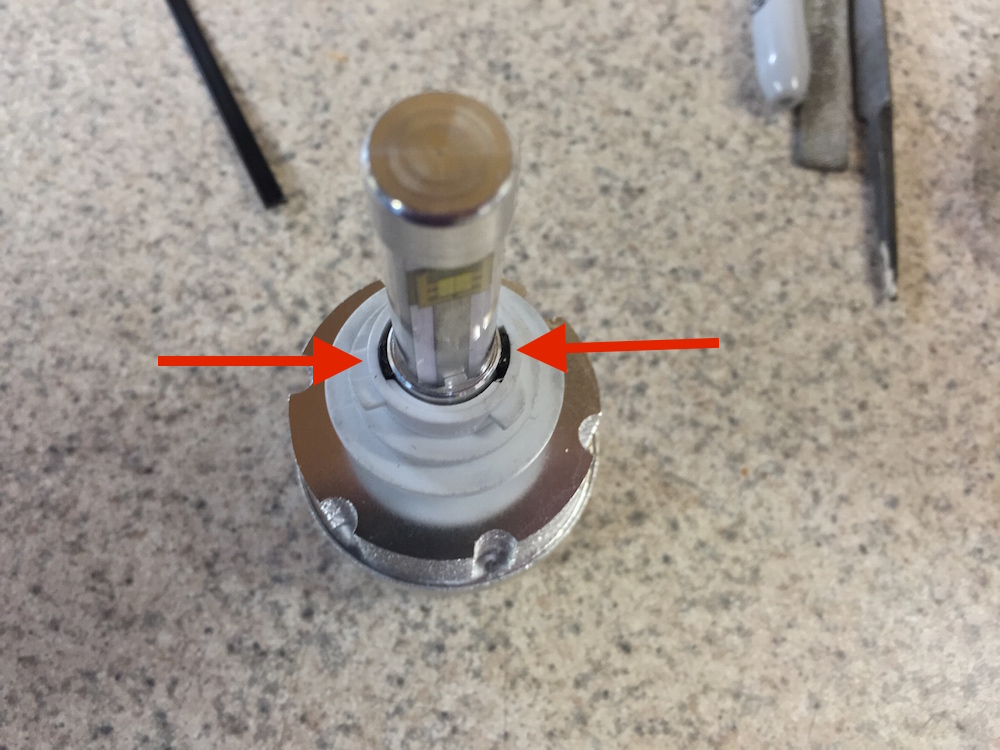
This tightens up the tolerance of the mount so that it does not wiggle in the reflector mounting flange. When the bulb is reinserted into the headlight reflector, make sure that it is not off axis and level in the reflector.
This will give a better (though not perfect) beam pattern. Please note on this photo the car is not pointed straight down this piece of road, it is pointed a bit to the left, hence the left side trees are illuminated more than the right side trees.

With the brighter LED high beams any headlight aiming error will be more apparent, especially on the right (left if looking at the car from the front) headlight. To adjust the vertical headlight aim there is a 8mm adjustment bolt located on the back of the headlight assembly. Simply turn the bolt until you are satisfied with the aim. If you don't know how to, or don't feel comfortable adjusting headlights, then any auto shop should be able to do this adjustment for you.

The left and right headlight enclosures have different bulb mounting flange orientations. These flanges will orient the drivers-side bulb about 30 degrees left off of vertical and the passenger -ide bulb is about 40 degrees off of vertical. Don't worry about that, and how it looks in relation to the bulbs reflectors. This orientation is done intentionally.
The LED high beam assembly draws 30w, needs 2.2 amps@ 12v, and has a color temperature of 6000K. The LED chip is exactly the same distance from the bulb base as a stock halogen filament, so the beam focus is spot on.
The upgrade was very easy and took less than an hour. The difference between the stock high-beams and the LED high beams is quite remarkable, and only set me back abut $55 for the pair of lamps.
I purchased these high beam lamps on eBay, and am quite satisfied with them.
The upgrade process is simply remove the stock halogen lights, and replace them with the new LED lights and their adapter cable. Everything fits inside the headlight housing, and unlike HID retrofits, no cutting or drilling (other some slight filing of a support in the left headlight enclosure described in this narrative) is required. Remember these upgrade kits are generic kits, and may have some extra pieces that you won't need. The kit I used has some extra mounting adapters and a rubber boot to cover the headlight enclosure access port. These are not necessary for using that LED upgrade kit with the LEAF.
UPDATE:
I have updated this post with more info on the various details of this DIY.
First off before attempting to do this yourself, you should have some basic automotive knowledge to be successful with this DIY mod, primarily knowing how to remove and replace an automobile headlight bulb, use of common hand tools, and knowing what the headlight configuration of your LEAF is. Without these three pieces of basic information, then it is probably best to avoid attempting this DIY.
The headlight configurations of the 2011-2015 LEAF are:
2011-2015 LEAF SL: LED low beams, H9 halogen high beams
2011-2012 LEAF SV: LED low beams, H9 halogen high beams
2013-2015 LEAF SV: H13 Halogen low/high beams
2013-2015 LEAF SV w/LED Headlights and Quick Charge Port Package: LED low beams, H9 halogen high beams
2013-2015 LEAF S: H13 Halogen low/high beams
The terms H9 and H13 refer to the type of mounting the bulb uses, and is the type of bulb you will look for when ordering your LED upgrade kit.
Here is what the two types of headlights are used for the 2011 - 2015 LEAF look like:
2011-2015 LEAF SL and SV with LED low beams and H9 Halogen high beam headlights:
2013-2015 LEAF SV and S with H13 Halogen low & high beam headlights
Here is what the two types of headlights look like side by side H13 on the left and H9 on the right.
All headlight bulbs have alignment tabs which must be properly aligned with the headlight housing to properly mount the bulb. For H9 & H13 bulbs there are 3 tabs with the center tab being longer that the two other tabs. The bulb is inserted and then twisted to lock it in place. These tabs must be properly aligned, and must be fully twisted into place. When installing the bulb don't force the bulb. There is enough room that you can look at the bulb from the front of the headlight to properly insert it and twist it into place.
The following narrative describes the installation of a H9 bulb into a LED low beam equipped headlight. Click here for a narrative on installing a H13 bulb into a Halogen low/high beam equipped headlight.
CREE/LTI LED bulb along with my LED city light in the high beam reflector.
Rear view of LED assembly viewed from headlight assembly access port.
Complete LED assembly with heat sink and H9 adapter cable
Rear view of LED assembly with heat sink and H9 adapter cable
Front view of LED assembly with heat sink. Notice the tabs on the base of the lamp. these tabs must be properly oriented with the headlight enclosure to properly install it and the yellow gasket must be fully seated around the base of the lamp.
This is what the lights look like head-on and compared to sunlight.
After I had installed the HID upgrade kit on my LED low beam equipped SV I found a small issue with the right side (left side if looking at the car from the front) high beam enclosure and an interference issue between the enclosure and the bulb that causes the LED bulb assembly to point lower than it should. This causes the beam spread to have a hotspot in the mid-right side.
At issue is an structure in the right side headlight enclosure which interferes with the bulb
The fix is to take a small flat file and remove about 1/64th of the bottom of this piece of aluminum.
The second issue is that the H9 mounting collar tolerance on the LED bulb is a bit loose which can cause the bulb to point off axis if there is interference if the bulb assembly rubs against the enclosure.
The solution that I MacGyvered was to take a plastic Zip-tie and insert it in the mount gaps to tighten the mount up against the bulb globe.
This tightens up the tolerance of the mount so that it does not wiggle in the reflector mounting flange. When the bulb is reinserted into the headlight reflector, make sure that it is not off axis and level in the reflector.
This will give a better (though not perfect) beam pattern. Please note on this photo the car is not pointed straight down this piece of road, it is pointed a bit to the left, hence the left side trees are illuminated more than the right side trees.
With the brighter LED high beams any headlight aiming error will be more apparent, especially on the right (left if looking at the car from the front) headlight. To adjust the vertical headlight aim there is a 8mm adjustment bolt located on the back of the headlight assembly. Simply turn the bolt until you are satisfied with the aim. If you don't know how to, or don't feel comfortable adjusting headlights, then any auto shop should be able to do this adjustment for you.
The left and right headlight enclosures have different bulb mounting flange orientations. These flanges will orient the drivers-side bulb about 30 degrees left off of vertical and the passenger -ide bulb is about 40 degrees off of vertical. Don't worry about that, and how it looks in relation to the bulbs reflectors. This orientation is done intentionally.
The LED high beam assembly draws 30w, needs 2.2 amps@ 12v, and has a color temperature of 6000K. The LED chip is exactly the same distance from the bulb base as a stock halogen filament, so the beam focus is spot on.