
There has been some discussion about installing your new Wet Okole covers, so I thought I would share my experience.
If you have questions, or a better way, feel free to share!
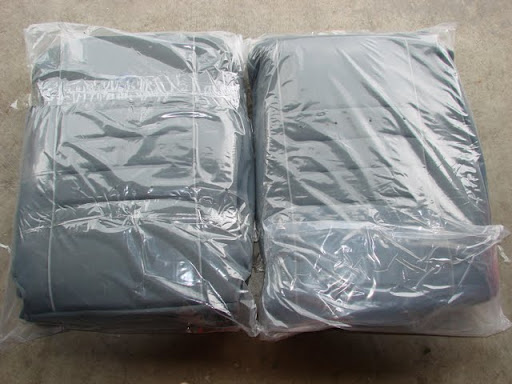
My covers arrived in a big cardboard box, with notation not to use a blade to open the box, as you might accidently damage the covers. This would be bad. So after carefully opening the box, I pulled out the covers, wrapped in plastic bags.
Prepare a nice clean area to lay out your covers, free from grease and grime; washing your hands might be a good idea too.
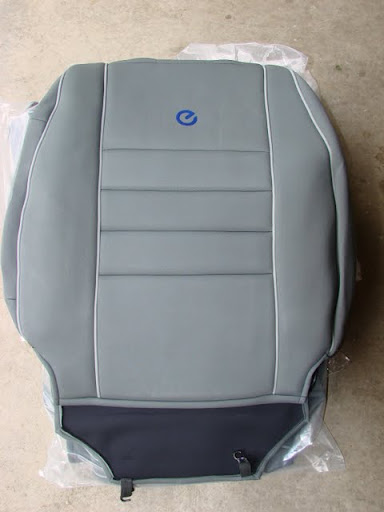
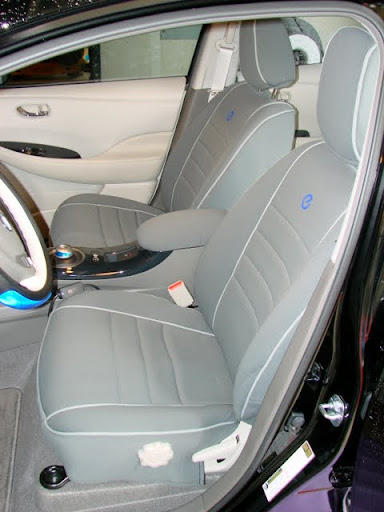
After unwrapping, I decided to start with the front seats.
The covers are particular to driver's and passenger's side, be sure to note openings for airbags, and seat adjustments, so that you have the correct one on the correct side. Unbuckle the straps, get something to kneel on, and get comfy.
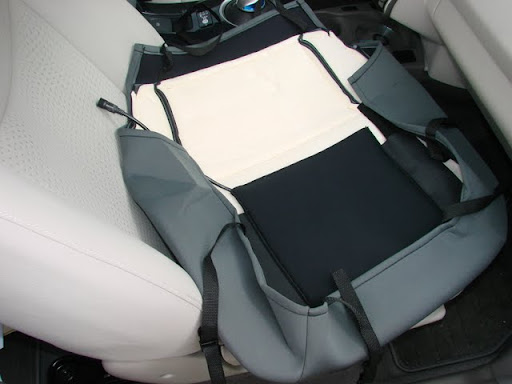
The front seats have a fabric flap that attatches with plastic hooks under the seat. Undo them, and pull the flap behind the seat.
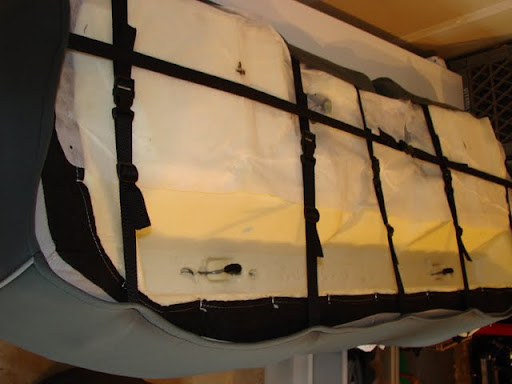
Slide the bottom seat cover into place, passing the straps thru to the rear. Pull the straps gently, until the cover appears, then work it evenly into place. About 1" of the cover was visible from the back. Passing the straps under the seat would be difficult without some sort of tool, so I pulled out my ace in the hole. The "grabber" (my name for it, I forget the actual brand name) was purchased at Home Depot, for around ten bucks. Pressing the plunger opens a 4-way claw and a LED light helps you see what you are doing. Invaluable. Adjust the buckles so they are far forward, to make things simpler.
Pull the 2 straps forward. Note there is a wire that passes at a slight angle for the seat adjustment. When the straps are buckled, make sure that you are over the wire on one side, and under it on the other so when the buckle is pulled tight, there is no interference. Don't buckle the side buckles just yet. Remove the headrests, by pushing the button on the seat top, and set them aside. Open the velcro on the upper cover, and slip it into place. If you have heaters pre-installed, make sure the wires are accessible for both the top and bottom halves, and run your hand under the cover to make sure it stayed in place. Feed the cover through to the back and fasten the velcro. Now the flap.
Recline the seat back as far as it will go, to give you a little more slack. Also, I rolled the OEM flap with the factory hooks back on itself, so the factory hooks were protected inside the roll. The new flap will hold it in place, and protect it.
My flap had two small black hooks on elastic, and the hooks were too small to fit over the bar you took the factory hooks off of. Not wanting to try to bend the hooks, I instead took a couple tie-wraps (some people call them zip-ties) and pre-bent them so they are more easily managed one-handed.
I loosely looped the tie wraps around the bar and tightened them only a couple clicks. Now with my grabber (love that thing!) I pulled the hooks forward, one at a time, and hooked them onto the tie-wrap. Once I made sure that the hook was in the right area, and tightening the tie-wrap would not interfere with anything, I tightened them up. Carefully snip off the excess. Cutting a wire by accident is really really bad, so be careful! I might take a second tie for each hook and actually thread it through the eye of the hook to make double sure it stays secure and cant pop loose, when I have the time and motivation. ~ edit: It might also be possible to pull the elastic strap a bit further and around the bar, so that you can hook it to itself, but the space is tight enough that maneuvering the hook without unbolting the seats (16mm) might be a pain. ~
Now do the side-to side strap for the bottom half. If you look at the seat rails there is a small opening on both sides right where your side straps are. On the door side it is covered by a plastic strip, but you can gently work the buckle under it and through the opening. Do the same for the other side too. Passing the straps through here keeps the cover from getting hung up when you adjust the seat.
Make sure the straps are all snug, but not too tight (it will pull the cover out of shape). I trimmed off all but about 4" of the excess strap, and carefully sealed the end with a lighter. Put the cover on the headrest (no real explanation needed here) and replace it. If you had seat heaters installed, plug the top into the bottom, and tuck the cord between the seat and console. Done!
Rinse and repeat for the other side. The driver's side seemed to have more space under the seat than the passenger's, and was easier IMO.
Rear Seats:
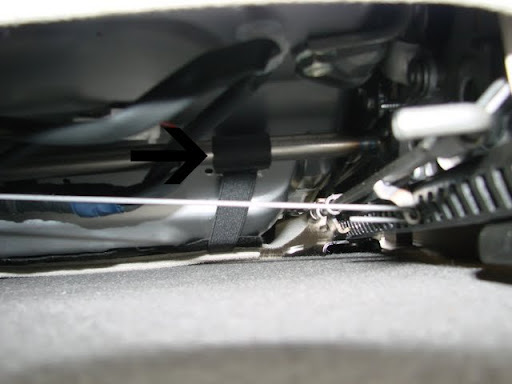
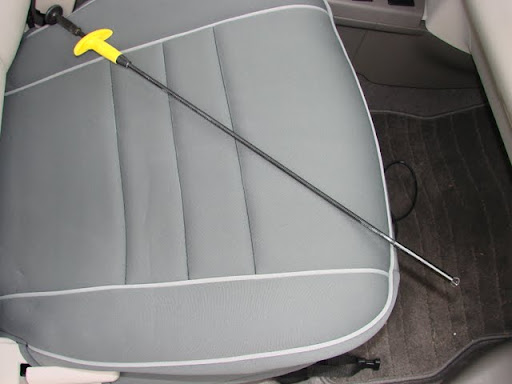
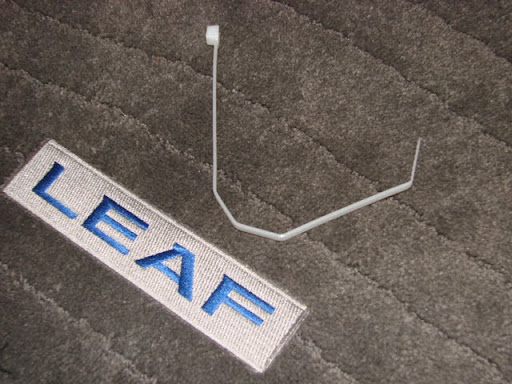
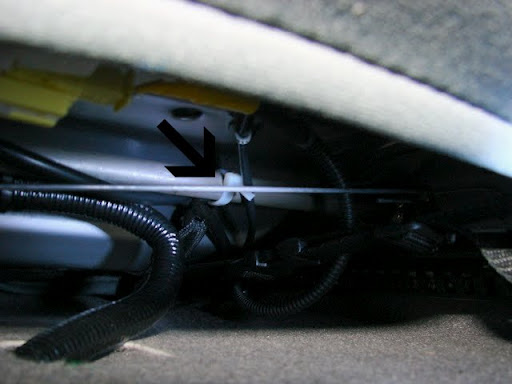
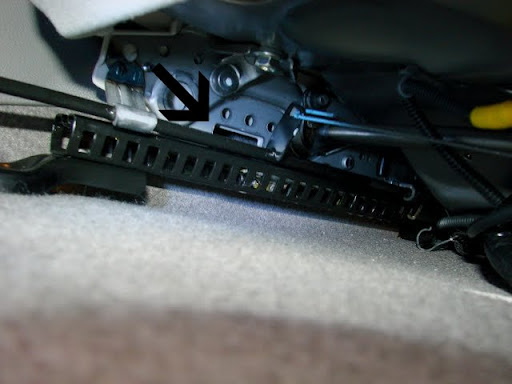
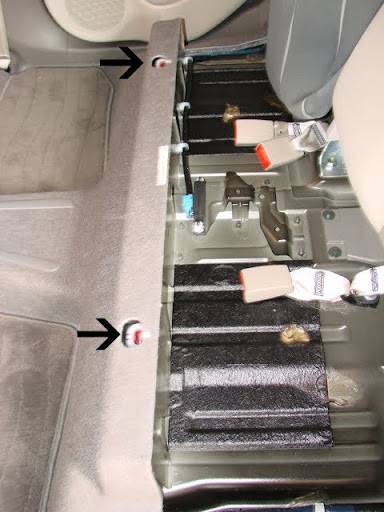
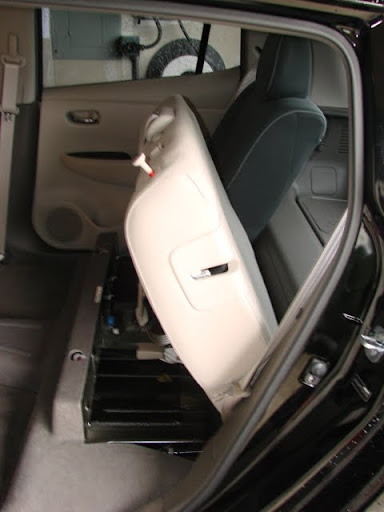
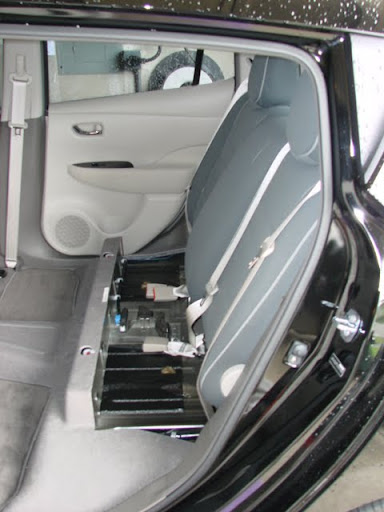
Putting on the rear covers was fairly simple because I removed the seat bottom (thank you tonyh!). Getting it back into place took a bit of fiddling, and a couple cuss words, so YMMV. To remove it, measure in about 13" from each side (you can do this one at a time). There is a hook there that you can release by pushing rearward on the seat and pulling up. I found it easier to do when I had my hand shoved in under the seat in that area. It makes a popping sound when it lets go. The next couple pics show the hook under the seat, and in the car. Remove the seat bottom from the car.
Remove the rear headrests, like you did the front, put the covers on them, and set them aside.
Tipping the seats forward made working the covers into place much easier. Once the holes on top were lined up with the release and headrest holes, I pulled the release through and then replaced the headrest to help keep things lined up. Fasten the velcro like you did with the front seats ... there is no flap on the rears, so you can breathe a sigh of relief. The larger cover also splits down the back, so the center seatbelt can be where it is supposed to be.
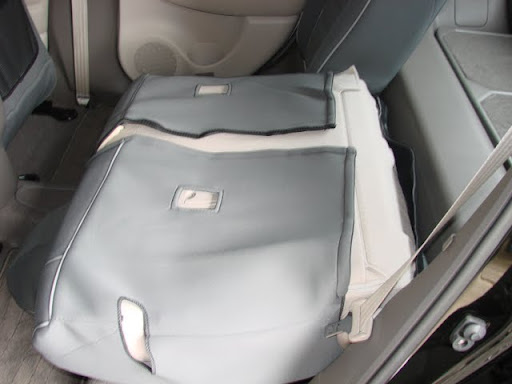
Put the the cover on the lower seat. Buckle all the straps, but again, dont make them too tight (a little too tight in the photo). They will slightly tighten up more when you snap the seat back into place.
Putting the bottom back into place takes a little patience, so take a deep breath. Release both seats so they can tip forward slightly, to give you a little more room, and gently work the seat back into place. Keep smoothing the seat cover, to ensure it doesn't wad up behind the seat as you stuff it into place. Make sure the belt buckles are up through the seat, and in the right order/orientation. When you get the seat back to its proper spot, pushing down on the hook area on each side pops it back in.
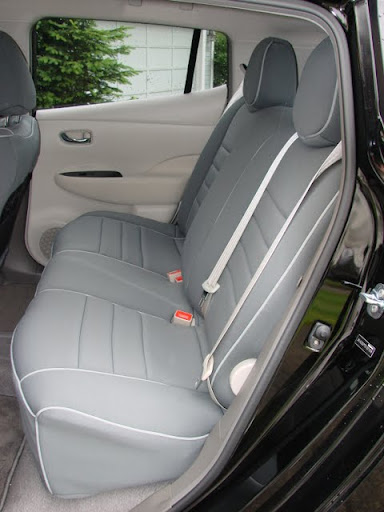
Guess what? You're done!
Enjoy!
If you have questions, or a better way, feel free to share!
My covers arrived in a big cardboard box, with notation not to use a blade to open the box, as you might accidently damage the covers. This would be bad. So after carefully opening the box, I pulled out the covers, wrapped in plastic bags.
Prepare a nice clean area to lay out your covers, free from grease and grime; washing your hands might be a good idea too.
After unwrapping, I decided to start with the front seats.
The covers are particular to driver's and passenger's side, be sure to note openings for airbags, and seat adjustments, so that you have the correct one on the correct side. Unbuckle the straps, get something to kneel on, and get comfy.
The front seats have a fabric flap that attatches with plastic hooks under the seat. Undo them, and pull the flap behind the seat.
Slide the bottom seat cover into place, passing the straps thru to the rear. Pull the straps gently, until the cover appears, then work it evenly into place. About 1" of the cover was visible from the back. Passing the straps under the seat would be difficult without some sort of tool, so I pulled out my ace in the hole. The "grabber" (my name for it, I forget the actual brand name) was purchased at Home Depot, for around ten bucks. Pressing the plunger opens a 4-way claw and a LED light helps you see what you are doing. Invaluable. Adjust the buckles so they are far forward, to make things simpler.
Pull the 2 straps forward. Note there is a wire that passes at a slight angle for the seat adjustment. When the straps are buckled, make sure that you are over the wire on one side, and under it on the other so when the buckle is pulled tight, there is no interference. Don't buckle the side buckles just yet. Remove the headrests, by pushing the button on the seat top, and set them aside. Open the velcro on the upper cover, and slip it into place. If you have heaters pre-installed, make sure the wires are accessible for both the top and bottom halves, and run your hand under the cover to make sure it stayed in place. Feed the cover through to the back and fasten the velcro. Now the flap.
Recline the seat back as far as it will go, to give you a little more slack. Also, I rolled the OEM flap with the factory hooks back on itself, so the factory hooks were protected inside the roll. The new flap will hold it in place, and protect it.
My flap had two small black hooks on elastic, and the hooks were too small to fit over the bar you took the factory hooks off of. Not wanting to try to bend the hooks, I instead took a couple tie-wraps (some people call them zip-ties) and pre-bent them so they are more easily managed one-handed.
I loosely looped the tie wraps around the bar and tightened them only a couple clicks. Now with my grabber (love that thing!) I pulled the hooks forward, one at a time, and hooked them onto the tie-wrap. Once I made sure that the hook was in the right area, and tightening the tie-wrap would not interfere with anything, I tightened them up. Carefully snip off the excess. Cutting a wire by accident is really really bad, so be careful! I might take a second tie for each hook and actually thread it through the eye of the hook to make double sure it stays secure and cant pop loose, when I have the time and motivation. ~ edit: It might also be possible to pull the elastic strap a bit further and around the bar, so that you can hook it to itself, but the space is tight enough that maneuvering the hook without unbolting the seats (16mm) might be a pain. ~
Now do the side-to side strap for the bottom half. If you look at the seat rails there is a small opening on both sides right where your side straps are. On the door side it is covered by a plastic strip, but you can gently work the buckle under it and through the opening. Do the same for the other side too. Passing the straps through here keeps the cover from getting hung up when you adjust the seat.
Make sure the straps are all snug, but not too tight (it will pull the cover out of shape). I trimmed off all but about 4" of the excess strap, and carefully sealed the end with a lighter. Put the cover on the headrest (no real explanation needed here) and replace it. If you had seat heaters installed, plug the top into the bottom, and tuck the cord between the seat and console. Done!
Rinse and repeat for the other side. The driver's side seemed to have more space under the seat than the passenger's, and was easier IMO.
Rear Seats:
Putting on the rear covers was fairly simple because I removed the seat bottom (thank you tonyh!). Getting it back into place took a bit of fiddling, and a couple cuss words, so YMMV. To remove it, measure in about 13" from each side (you can do this one at a time). There is a hook there that you can release by pushing rearward on the seat and pulling up. I found it easier to do when I had my hand shoved in under the seat in that area. It makes a popping sound when it lets go. The next couple pics show the hook under the seat, and in the car. Remove the seat bottom from the car.
Remove the rear headrests, like you did the front, put the covers on them, and set them aside.
Tipping the seats forward made working the covers into place much easier. Once the holes on top were lined up with the release and headrest holes, I pulled the release through and then replaced the headrest to help keep things lined up. Fasten the velcro like you did with the front seats ... there is no flap on the rears, so you can breathe a sigh of relief. The larger cover also splits down the back, so the center seatbelt can be where it is supposed to be.
Put the the cover on the lower seat. Buckle all the straps, but again, dont make them too tight (a little too tight in the photo). They will slightly tighten up more when you snap the seat back into place.
Putting the bottom back into place takes a little patience, so take a deep breath. Release both seats so they can tip forward slightly, to give you a little more room, and gently work the seat back into place. Keep smoothing the seat cover, to ensure it doesn't wad up behind the seat as you stuff it into place. Make sure the belt buckles are up through the seat, and in the right order/orientation. When you get the seat back to its proper spot, pushing down on the hook area on each side pops it back in.
Guess what? You're done!
Enjoy!
")