DIY Horn Upgrade Mod - Updated Jan 12

My Nissan Leaf Forum

Help Support My Nissan Leaf Forum:

This site may earn a commission from merchant affiliate links, including eBay, Amazon, and others.
Question for those of you who installed the Framm horn without using the relay: One ground wire or two? One ground wire can go from the Leaf's wiring to the ground bolt, or that ground wire can be pigtailed for both horns. I've seen posts here that mention using two pigtails, so assume the other is to split the ground.
 
Add me to the list of successful installs. I went with the Fiamms and installed them vertically - it seemed easier and more sturdy than using and extra bracket. It requires a bit more dexterity, and I did end up with slightly bloodied knuckles from close brushes with sharp radiator fins.

It ended up taking over an hour, mainly because of some things that may have changed with the 2012's. The original horn had a very thick paste in the plug, probably added to keep moisture out. It made pulling out the plug a lot harder than I though it would. Also, the ground plug from the Leaf wasn't a plug at all, instead it was a metallic loop. I ended up bolting it to the hole in the center brace just above where the two Fiamms are installed.

A mild concern - the installation requires the "front" (red plastic part) to be facing the radiator. Thus, the power leads are facing the front of the car and will get wet when driving through wet weather. I covered the exposed parts as best I could with electrical tape, but is there a protectant that someone can recommend? Or is it really a concern at all?
 
I just installed the PIAA 400/500Hz set on my 2012 Leaf. Together they pull about 8 amps according to specifications. I was willing to pay a little extra for them (made in Japan) in the hopes that the job won't have to be re-done in the future. Making the 2 sets of power splitters (one for ground, one for +12V) was probably the slowest part of the job, but next time it won't be :). I bought some beautiful insulated disconnects, and then had to carefully chop off half of the insulation on the male disconnects, using a box cutter. It looks pretty nice now that it is all put together, with no exposed wiring and no modification of existing wiring.

I used some red 14 gauge wire for the positive leads, but if it is visible from the front of the car, I will replace the red wire harness with a black one I made using the leftover wire from the PIAA kit. Either way I'll probably donate the extra power splitter to someone at the Bay Area Leaf owners meeting July 14. I almost have a second spare splitter made up, just need to get a couple more female 18 gauge fully insulated 1/4 inch disconnects to finish it. Some lucky person will avoid the trip to the store with new horn in hand to check the fit of the connectors... plus wiring harness assembly time.

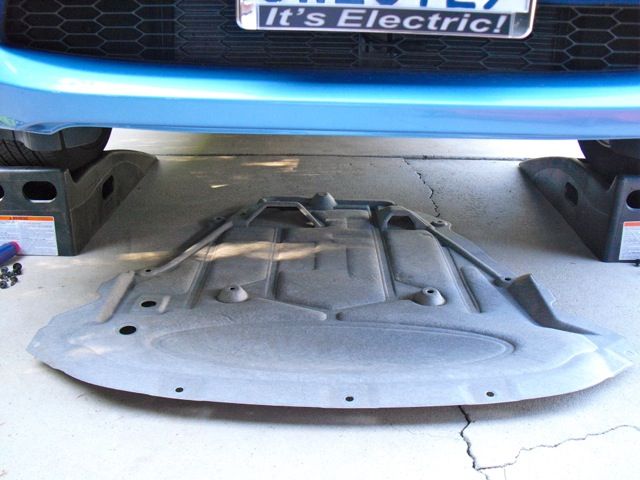
Thanks to this thread, I put a rag down to keep stuff from falling under the radiator. I was almost certainly saved from half an hour of fishing around for bolts.

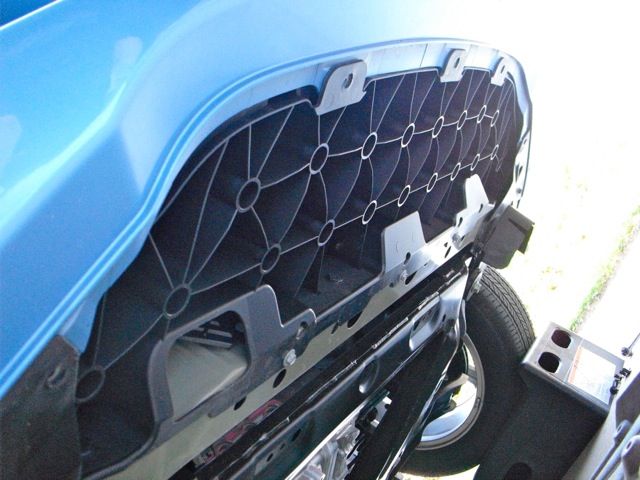
I accessed the horn from the top. I have long arms so it wasn't too hard to reach.

Here's the optimal parts list for installing dual horns that draw 8 amps or less. If I ever have to do it again, I'll be able to look up my posting here :). Note that the PIAA kit comes with 2 ground wires about a foot long, with a female fully insulated disconnect on one end, and a spade lug on the other. Chop off the spade lugs, cut both wires in half, and you have your 4 pieces of 18 gauge wire with 2 fully insulated female disconnects already installed.

Optimal parts list for dual horn installation (access via coolant reservoir)
====================================================
18 gauge stranded wire (about 2 feet of wire, cut into four 6-inch pieces)
2 male disconnects, 1/4 inch (6.4 mm), for 14-16 gauge wire (you will stuff two 18-gauge wires in each of these)
4 female disconnects, 1/4 inch (6.4 mm), for 18 gauge wire, fully insulated (14-16 gauge will work but isn't optimal)
wire stripper for 18 gauge wire (or a sharp knife)
crimper (often included with the wire stripper)

10mm socket with long extension bar (for removing the coolant reservoir, extension to avoid clobbering headlight)
12mm socket with short extension bar (for the horn)
flat-bladed screwdriver for popping the plastic fasteners on the apron above the radiator
 
I purchased the FIAMM 74100 El Grande - Twin Horns, sounds like a real car horn.. mounted them to the stock bracket, the stock bracket i bolted it on did feel flimsy, I might go back in and bolt it to the main middle bolt so it could remain more sturdy.
 
Got the El Grande horns installed today by fellow board member Andy and this is the best $18.00 mod done. Now the car sounds manly and real. Used to sound toy-like.

Thanks Andy,

Ian B
 
I installed my new Wolo 320-2T horn today and it works great. I wanted to go through the bottom of the car but I ran into a problem. First I took the lower pan off:

CIMG1130.jpg


I found this separate panel installed between the bumper and frame:

CIMG1131.jpg


I hadn't seen this panel mentioned in anyone else's install. I removed all the bolts and pins that I could see to try and remove it, but it wouldn't budge. Closer inspection showed that it has rear horizontal tabs that slot into the metal frame, and the front extends into the bumper cover. To me, it looks like you might have to take the bumper cover off to drop this panel. I gave up and went in through the top to install the horns. The build date of my car is 3/2012.

Anyone figure out how to get this panel out?
 
TomT said:
It looks like the piece they started installing to prevent snow and ice incursion in to the engine compartment.

aqn said:
I started a new topic on this over in the "Engineering" section: "Extra forward underbody piece on newer LEAFs?".

But then, why wouldn't the existing under car panel do that? Certainly the design looks more like a (really cheap and light) crush device, but I find it odd that it would be an add on (older LEAF's don't have it). My 4/2012 build date car has it.

It is not in any way connected to the existing bumper, so my idea is that it is simply added support for the lower grill opening lip.
 
According to the description that was in the voluntary campaign notice that went out, apparently in snow more than a couple of inches deep, due to the aerodynamics of the car, snow and ice could be forced in to that area and then in to the engine compartment. The new bracket supposedly prevents that. I suspect all new cars now get it regardless of where they are destined since it is simply easier to do it that way at the factory.

TonyWilliams said:
But then, why wouldn't the existing under car panel do that?
 
If I were a bettin' man, I'd place my money on the crush absorber, just based on the shape and how the potential impact loads would be transferred. I'd think the intrusion device would have more of a baffle shape to it.
 
I took a look at a couple of 2012 LEAFs at a dealer here in San Jose today, and none of them had this piece, so the idea of a reenforcement to prevent snow intrusion has merit.

We don't get much snow here. :)
 
Back
Top