


JeremyW
Well-known member
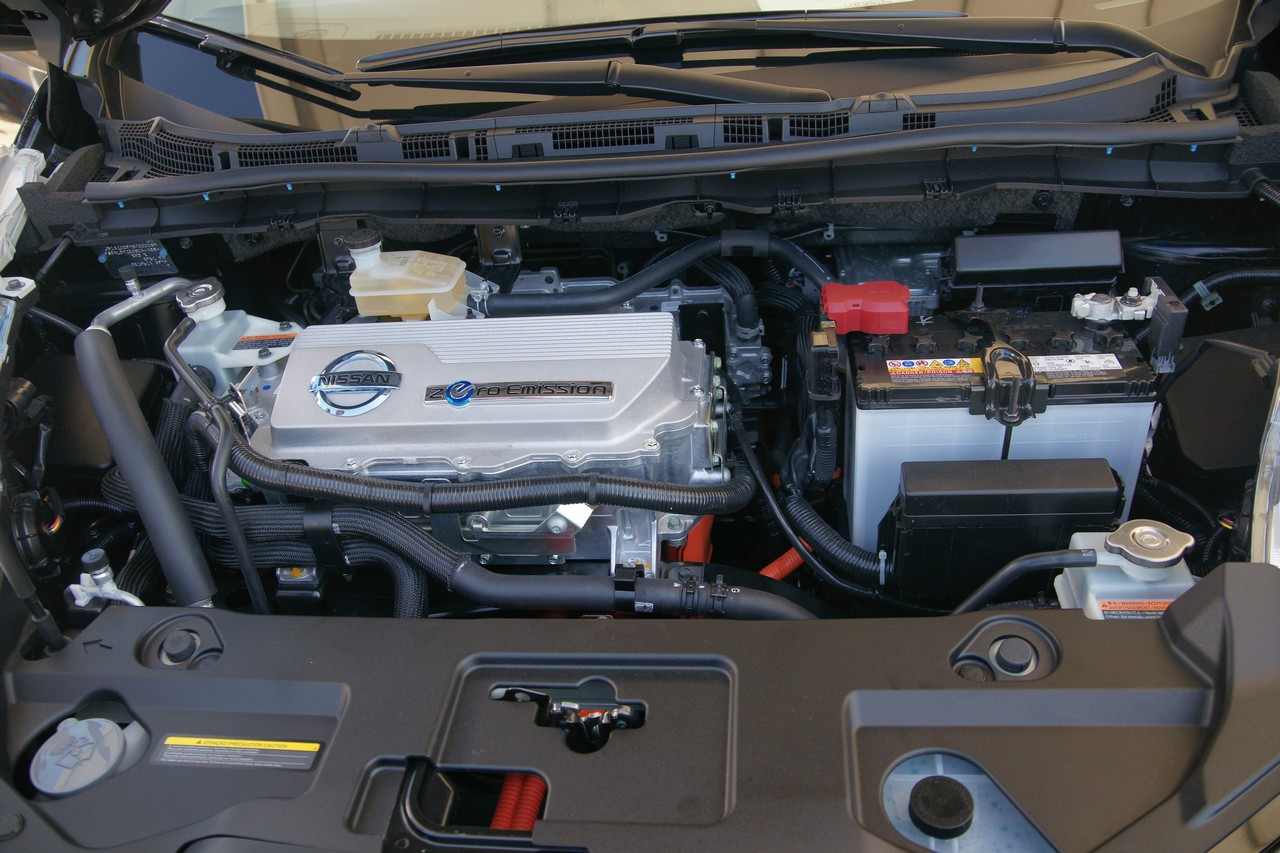
Welcome! This thread is dedicated to those with 2011 or 2012 Leafs and are interested in adding a Brusa charger (or chargers, more on that in a bit) under the hood in place of the original inverter cover. It turns out the original cover (which looks like a “valve cover” for an engine) is mostly hollow, and replacing it with a flat plate leaves enough room for a second or even a third on board charger. The two originators of this modification are Ingineer and EVDRIVER, but they have decided to not share the details on how they accomplished mounting and interface with the leaf. With the help of many bright minds, I have not only succeeded installing a Brusa in my leaf but also wish to share how I accomplished it and how you can too.
With a single Brusa NLG513 under the hood combined with the existing on board charger in the trunk, your Leaf will able to charge at the maximum rate that most public EVSE’s around are rated for- 30A and 208V for around 6.24 kW draw. With a 32A or higher rated EVSE at 240V, the maximum draw is around 7.68kW. I estimate my charge time at full power is around three hours from near empty to full. This is a bit faster than a 2013 Leaf with the 6kW charger.
The increased rate is a game changer, and to me is often more convenient then a thirty minute fast charge, since I can often have lunch or otherwise occupy my time doing something else while charging instead of waiting for a fast charge to complete. I feel that it has significantly improved the usability of my vehicle.
Here’s a breakdown of what is required:
1. Purchasing one or more Brusa NLG513 chargers either air or water cooled. If going for two under the hood, water cooling is required due to heat and possibly space issues. I would recommend hotter climate owners stick with water cooling even if only getting one. The air cooled units de-rate under high temperature, as I have experienced personally with my air cooled unit in Southern California. See the second post on current pricing and group buys available.
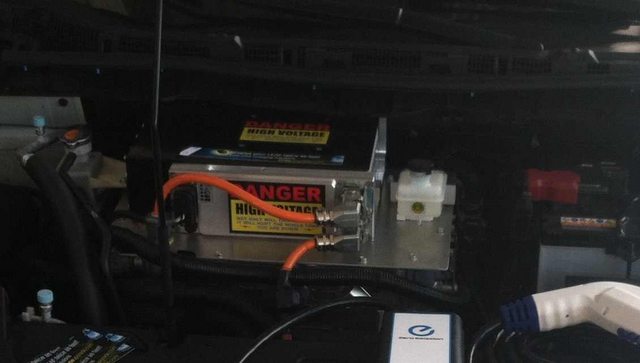
2. A mounting plate and high profile gasket. This is what took a majority of the development time. A pattern is available for you to get a plate and gasket water-jetted or CNC-ed. You will also need new mounting bolts since the plate is substantially thicker than the old cover. See the second post below for more information on availability of plates and gaskets.
3. Modification of the J1772 inlet of your leaf. This involves splicing into the shielded wires directly after the inlet. This part is replaceable if you wish to return the leaf to stock form, and we use metri-pack connectors to allow disconnection of the AC cable so removal of the charger is relatively easy to reverse for a quick trip to the dealer. The connectors hide well in the tubing of the pigtail.
4. A Leaf DD (or similar device) to listen to the leaf’s EV CAN bus for the existing onboard charger messages and relay parameters over the bus to the Brusa. You will need to splice into the CAN lines running to the inverter so that the Brusa can be added to the bus. As scary as that sounds this splice is easily hidden. The CAN bus is meant to have many devices on it, and the Brusa behaves properly and does not conflict with termination or message ID’s used by the Leaf’s systems. The onboard charger gives pilot, proximity, current, and line voltage over the CAN bus which greatly simplifies command of the Brusa. There is an Automatic mode that the Brusa supports, however one would have to manually add current control (to dial things down for lower power EVSEs) and a proximity circuit to cut charging current when removing the plug. Thus, CAN mode is the easiest way to go, with the Brusa acting as a slave controlled by the Leaf DD.
[Below to be updated with more info ASAP! Thanks for your patience! –Jeremy]
The Brusa Models - Features and Pricing
Currently, we are using the NLG513. It’s rated for 3.6kW and puts about 3.3kW into the battery, much like the existing Nichicon charger. However, this sucker is built like a tank, more compact than the Nichicon, and comes in air and water cooled variants. It also fully isolated and contains many protection circuits to prevent destruction of itself and leaf. It’s very well designed and very high quality. The retail price with cables is around $2600, with our group buy it’s around $2,200.
Mounting Plate and Gasket
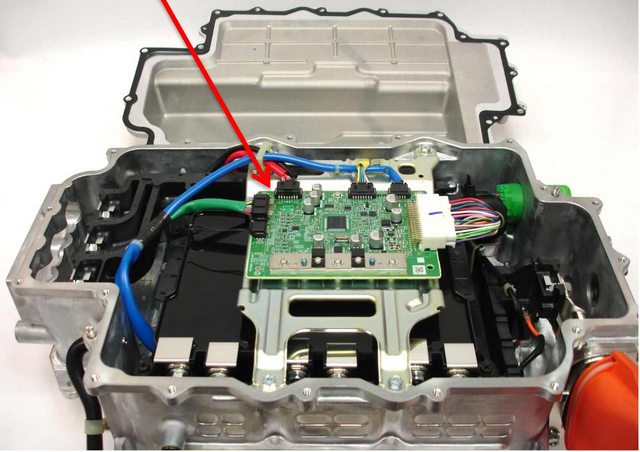
This was in my opinion the toughest part of the development. We got a bit fooled in the beginning thinking that you could simply replace the top cover with a thin sheet of aluminum and go from there. The trouble is that there is a control board (and associated mounting bracket) for the inverter that sits proud of the cover mounting plane, meaning you must have a plate that is thick enough to “contain” the board protrusions. JasonA and Tony Williams have been very helpful in making template mock ups and eventually making a great template that allows a water jet or CNC machine to cut out a plate that
Modification of the J1772 Inlet
Control of the Brusa via CAN using the Leaf DD
[Will update soon, Jason and I are using prototype units. Working with GregH on testing for automatic amperage selection and ramp down of the Brusa]
Final Installation
[TBD]
Total cost is expected to be around $3000-$3500.
Here are some additional reading materials you may find useful:
The Leaf Service Manual. You may download this for $20 from http://nissan-techinfo.com
Brusa NLG513 Data Sheet
Brusa NLG513 User Manual
Brusa NLG513 CAN Command Matrix
Metric Mind Website on the Brusa
Metric Mind Website on Victor's leaf with three :shock: water cooled Brusa's under the trunk
ChargeStar Software Download (probably not needed if just controlling using CAN)
Charging Profile for Leaf if using Automatic control
Finally, a word of caution: Electricity is dangerous. The leaf uses 400V DC for the main traction pack, and is not something to be taken lightly. It will kill you if you try to work on this live, and the pack has sufficient energy to weld tools. DC causes muscles to contract meaning your body could end up clamping down onto a lethal shock. Before performing ANY work, disconnect the 12v negative terminal and pull the main traction pack fuse located in the center of the rear passenger floor.
With a single Brusa NLG513 under the hood combined with the existing on board charger in the trunk, your Leaf will able to charge at the maximum rate that most public EVSE’s around are rated for- 30A and 208V for around 6.24 kW draw. With a 32A or higher rated EVSE at 240V, the maximum draw is around 7.68kW. I estimate my charge time at full power is around three hours from near empty to full. This is a bit faster than a 2013 Leaf with the 6kW charger.
The increased rate is a game changer, and to me is often more convenient then a thirty minute fast charge, since I can often have lunch or otherwise occupy my time doing something else while charging instead of waiting for a fast charge to complete. I feel that it has significantly improved the usability of my vehicle.
Here’s a breakdown of what is required:
1. Purchasing one or more Brusa NLG513 chargers either air or water cooled. If going for two under the hood, water cooling is required due to heat and possibly space issues. I would recommend hotter climate owners stick with water cooling even if only getting one. The air cooled units de-rate under high temperature, as I have experienced personally with my air cooled unit in Southern California. See the second post on current pricing and group buys available.
2. A mounting plate and high profile gasket. This is what took a majority of the development time. A pattern is available for you to get a plate and gasket water-jetted or CNC-ed. You will also need new mounting bolts since the plate is substantially thicker than the old cover. See the second post below for more information on availability of plates and gaskets.
3. Modification of the J1772 inlet of your leaf. This involves splicing into the shielded wires directly after the inlet. This part is replaceable if you wish to return the leaf to stock form, and we use metri-pack connectors to allow disconnection of the AC cable so removal of the charger is relatively easy to reverse for a quick trip to the dealer. The connectors hide well in the tubing of the pigtail.
4. A Leaf DD (or similar device) to listen to the leaf’s EV CAN bus for the existing onboard charger messages and relay parameters over the bus to the Brusa. You will need to splice into the CAN lines running to the inverter so that the Brusa can be added to the bus. As scary as that sounds this splice is easily hidden. The CAN bus is meant to have many devices on it, and the Brusa behaves properly and does not conflict with termination or message ID’s used by the Leaf’s systems. The onboard charger gives pilot, proximity, current, and line voltage over the CAN bus which greatly simplifies command of the Brusa. There is an Automatic mode that the Brusa supports, however one would have to manually add current control (to dial things down for lower power EVSEs) and a proximity circuit to cut charging current when removing the plug. Thus, CAN mode is the easiest way to go, with the Brusa acting as a slave controlled by the Leaf DD.
[Below to be updated with more info ASAP! Thanks for your patience! –Jeremy]
The Brusa Models - Features and Pricing
Currently, we are using the NLG513. It’s rated for 3.6kW and puts about 3.3kW into the battery, much like the existing Nichicon charger. However, this sucker is built like a tank, more compact than the Nichicon, and comes in air and water cooled variants. It also fully isolated and contains many protection circuits to prevent destruction of itself and leaf. It’s very well designed and very high quality. The retail price with cables is around $2600, with our group buy it’s around $2,200.
Mounting Plate and Gasket
This was in my opinion the toughest part of the development. We got a bit fooled in the beginning thinking that you could simply replace the top cover with a thin sheet of aluminum and go from there. The trouble is that there is a control board (and associated mounting bracket) for the inverter that sits proud of the cover mounting plane, meaning you must have a plate that is thick enough to “contain” the board protrusions. JasonA and Tony Williams have been very helpful in making template mock ups and eventually making a great template that allows a water jet or CNC machine to cut out a plate that
Modification of the J1772 Inlet
Control of the Brusa via CAN using the Leaf DD
[Will update soon, Jason and I are using prototype units. Working with GregH on testing for automatic amperage selection and ramp down of the Brusa]
Final Installation
[TBD]
Total cost is expected to be around $3000-$3500.
Here are some additional reading materials you may find useful:
The Leaf Service Manual. You may download this for $20 from http://nissan-techinfo.com
Brusa NLG513 Data Sheet
Brusa NLG513 User Manual
Brusa NLG513 CAN Command Matrix
Metric Mind Website on the Brusa
Metric Mind Website on Victor's leaf with three :shock: water cooled Brusa's under the trunk
ChargeStar Software Download (probably not needed if just controlling using CAN)
Charging Profile for Leaf if using Automatic control
Finally, a word of caution: Electricity is dangerous. The leaf uses 400V DC for the main traction pack, and is not something to be taken lightly. It will kill you if you try to work on this live, and the pack has sufficient energy to weld tools. DC causes muscles to contract meaning your body could end up clamping down onto a lethal shock. Before performing ANY work, disconnect the 12v negative terminal and pull the main traction pack fuse located in the center of the rear passenger floor.
 .
.