How do you remove the hood plastic?

My Nissan Leaf Forum

Help Support My Nissan Leaf Forum:

This site may earn a commission from merchant affiliate links, including eBay, Amazon, and others.

mcochris

Active member
Joined
Jan 27, 2012
Messages
41
Location
Winter Park FL
There's a large black plastic trim piece attached to the hood, near the windshield. I tried turning the nuts on the bolts that hold it on, but they don't move easily and when I turn the nut CCW, they don't reverse off the bolt thread. I'm afraid I'll crack the plastic. Has anyone removed this part? I couldn't find it in the service manual.

Plastic trim piece:
dsc7623.jpg


Associated nut:
dsc7621l.jpg


Thanks
 
mcochris said:
There's a large black plastic trim piece attached to the hood, near the windshield. I tried turning the nuts on the bolts that hold it on, but they don't move easily and when I turn the nut CCW, they don't reverse off the bolt thread. I'm afraid I'll crack the plastic. Has anyone removed this part? I couldn't find it in the service manual.

Plastic trim piece:
dsc7623.jpg


Associated nut:
dsc7621l.jpg


Thanks

I'm looking for removal tips for this plastic also. I'm planning on adding some color to this piece.
 
The removal is covered in the Door Lock (DLK) part of the manual near the end.
the nuts are only on with 12 in-lb of torque, so should not take much.
There is a right, and left part. The manual says disengage mounting clips (maybe 3 per half).
Not sure if this just means pry from the front or otherwise.
 
cliff said:
The removal is covered in the Door Lock (DLK) part of the manual...

Of course. What was I thinking? :lol:

Thanks!

FWIW, the nuts on mine remove easily. In fact one side was loose from the factory (rattling). It's the second minor assembly boo-boo I've found already on our 2015.
 
mwalsh said:
Cliff, do you have a non-illustrated version of the manual? From the way you wrote it seemed to appear that way, since the illustration in my version covers what you had to surmise.
I did see the illustration, but could not tell if the tool was just for prying, or had a special shaped end.
Seems it was just for prying.
 
cliff said:
mwalsh said:
Cliff, do you have a non-illustrated version of the manual? From the way you wrote it seemed to appear that way, since the illustration in my version covers what you had to surmise.
I did see the illustration, but could not tell if the tool was just for prying, or had a special shaped end.
Seems it was just for prying.

You can get a set of plastic trim pry tools cheap at Harbor Freight .
 
You can use my patented masking/duct tape on a putty knife technique too. I have the plastic tools from HF, but I sometimes find (and I think the same would hold true for other brands) that the edges are "too fat" for certain very close fitting gaps (separating the parts of LEAF's shifter knob would be a very good example). I also have putty knives that are both very skinny and quite fat (the widest one I have is like 6") to get behind a variety of trim pieces - the wider the knife you can use, the less chance of localized marring. I suppose you could shave down the ends of the HF tools too, if you wanted to.

With this part, I find myself wondering if the those trim fasteners will be suitable for reuse. With similar looking door panel fasteners, the prongs (for want of a better word) get bent out of shape too badly to effect a snug, lasting re-installation. Nubo, could you get back to us on that?
 
mwalsh said:
With this part, I find myself wondering if the those trim fasteners will be suitable for reuse. With similar looking door panel fasteners, the prongs (for want of a better word) get bent out of shape too badly to effect a snug, lasting re-installation. Nubo, could you get back to us on that?

Sure. Probably won't be until at least next weekend as I won't be getting the paint until Monday.

Judging from the diagram, it looks like the fasteners use a flexible skirt that pops through the cylinder. But we shall see. If one gets mangled hopefully I can put a generic type into service.
 
Here's how it went.

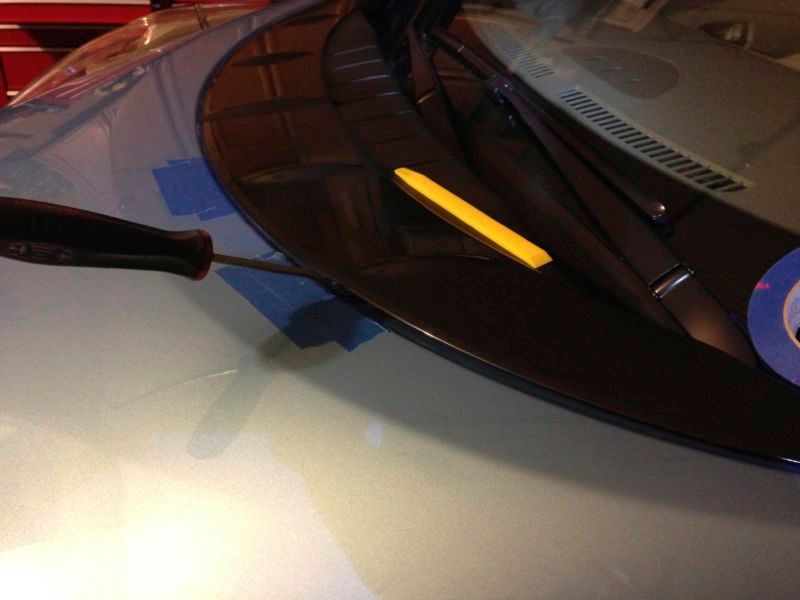
Easy enough to pop the removeable fasteners, protecting the paint as per the diagram.
IMG_2215_zps4076f673.jpg


But first, remove the mounting nuts, as instructed. There is one on either corner at the outside of the car, which I knew about.

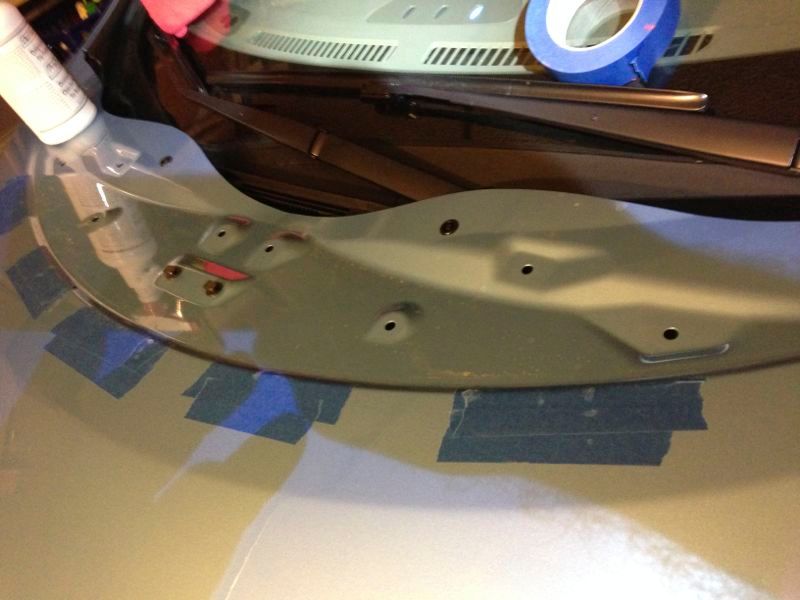
Also, there is a pari of mounting nuts near the center, which I did not know about. You can see the studs in this picture, along with all of the pop-in fastner hole locations:
IMG_2216_zpsf3579bbb.jpg


This is what happens when you don't realize the center fastners are actually bolts, not pop-outs. JB Weld to the rescue. I've had great luck with the stuff; usually ends up being stronger than the original material. First of 2 applications:
IMG_2220_zps0b4fd5b4.jpg


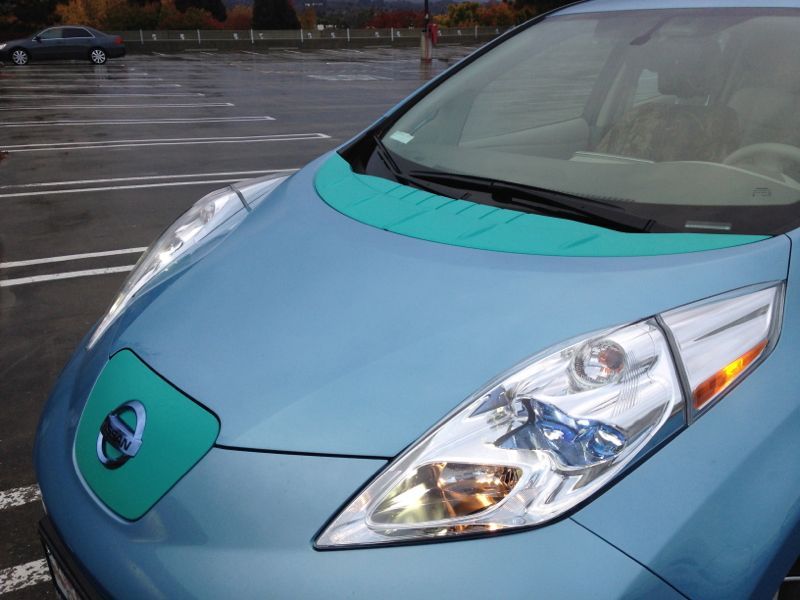
And here was the end-goal, thanks to Plasti-Dip rubber coating. I love it on the hood cover. Not entirely sure about the charge cover but my wife likes it.
IMG_2226_zps6c83fd28.jpg


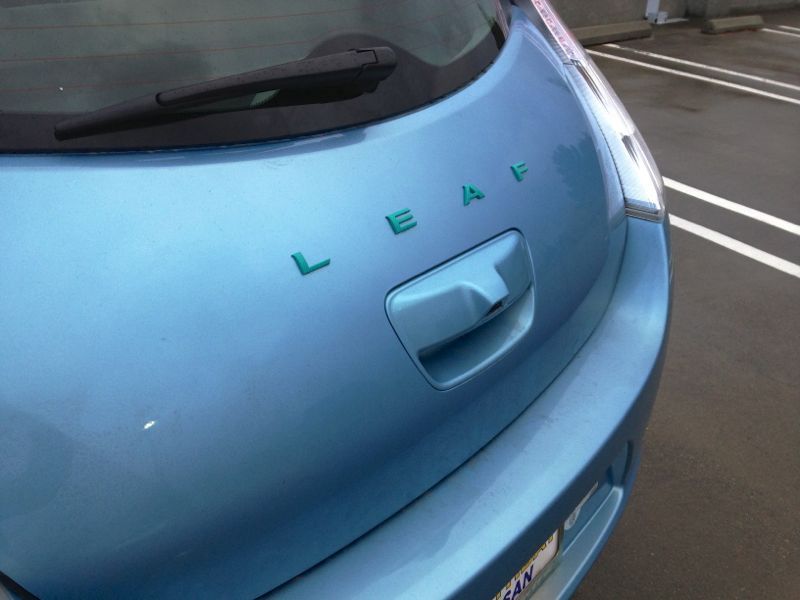
And I reprised my badge relocation from my 2012. All badges removed exept front logo and relocated "L E A F".
LAST_zps0ca29f91.jpg


Since the hood cover is 2 pieces I'm not sure how much relative movement there will be. If the two pieces move too much against each other it might end up fretting through the rubber coating but we'll see. Worst case I just remove the Plasti Dip. I did this to the wheels on my first LEAF and it only took a matter of minutes to remove when returning the car. When you're ready it just peels off. But it's fairly durable until then.

The pop-out fasteners seem to work ok. I did bust the bracket for one of them as a side effect from not realizing the bottom 2 center points were hard-fasteners.
 
Back
Top